
If you’ve ever faced squeaky brakes or noticed your stopping distance increasing, you know how important your brake system is. But did you know you can save time and money by fixing some brake issues yourself?
Understanding the right DIY brake repair tools is the first step to gaining confidence and control over your car’s safety. You’ll discover exactly which tools you need, how they work, and how they can make your brake repair easier and more effective.
Keep reading to unlock the secrets that will empower you to tackle brake repairs like a pro.

Credit: simonsautorepairtaunton.com
Essential Brake Repair Tools
Fixing brakes at home needs the right tools. Using these tools makes the job safer and easier.
This guide explains four important tools for brake repair. Knowing how to use them helps you do the job well.
Brake Caliper Tool
A brake caliper tool helps push the brake piston back. This is needed before fitting new brake pads.
It fits into the caliper and turns to compress the piston. This tool prevents damage to the brake parts.
Brake Bleeder Kit
The brake bleeder kit removes air from the brake lines. Air in the lines can cause spongy brakes and reduce safety.
This kit usually includes a tube and a container. It helps flush old brake fluid and improves brake response.
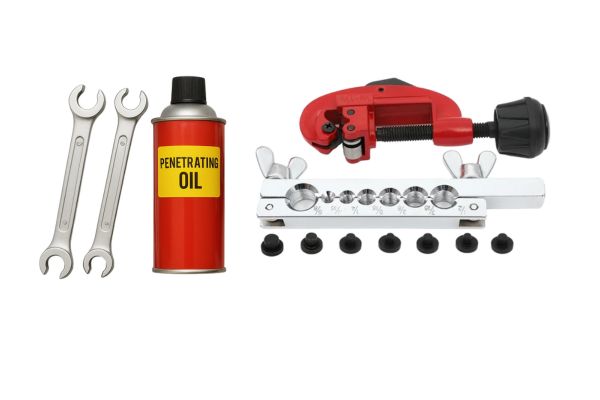
Brake Line Wrench
A brake line wrench fits brake line nuts better than regular wrenches. It reduces the risk of rounding off the nuts.
This tool helps you loosen or tighten brake lines without damage. It is essential for brake line repairs and replacements.
Jack And Jack Stands
A jack lifts your vehicle off the ground. Jack stands hold the vehicle safely while you work underneath.
Always use jack stands after lifting the car. This prevents accidents and keeps you safe during brake repairs.
Specialized Tools For Brake Pads
Repairing brake pads yourself needs the right tools. These tools make the job easier and safer.
Using specialized tools helps you press pistons back and install pads correctly.
C-clamp And Piston Compressor
A C-clamp pushes the brake piston back into its cylinder. This makes space for new brake pads.
Piston compressors are similar but designed to fit different brake calipers. They apply even pressure.
- Keep the piston clean before using the tool
- Place the clamp or compressor carefully on the piston
- Tighten slowly to avoid damage
Brake Pad Spreader
The brake pad spreader helps separate the pads. It creates room for the piston to move back.
This tool fits between the brake pads and pushes them apart evenly. It prevents pad damage.
- Insert the spreader between brake pads
- Turn the handle to expand the tool
- Watch the pads move apart safely
Brake Pad Grease Applicator
A grease applicator helps apply brake grease to pad contact points. This reduces noise and wear.
Using the right grease prevents squealing and keeps brakes working smoothly for longer.
- Clean pad edges before applying grease
- Use a small amount on metal contact points
- Avoid getting grease on the pad surface
Tools For Rotor And Drum Maintenance
Maintaining your vehicle’s brakes is key to safe driving. You need the right tools to work on rotors and drums. These tools help keep brake parts clean and working well.
This guide explains common tools for rotor resurfacing, drum brake adjustment, and cleaning. Using these tools correctly saves money and improves brake performance.
Rotor Resurfacing Tools
Rotors may become uneven or warped over time. Resurfacing tools smooth the rotor surface to restore proper contact with brake pads. Common tools include brake lathes and sanding blocks.
- Brake Lathe:Machines the rotor to a flat, even surface.
- Sanding Blocks:Used for minor smoothing and rust removal.
- Dial Indicator:Measures rotor runout to check for warping.
- Calipers:Measure rotor thickness to ensure safety limits.
Drum Brake Adjustment Tools
Drum brakes need precise adjustment for correct braking force. Special tools help set the brake shoes at the right distance from the drum. Common tools include brake spoon and star wheel adjuster.
| Tool | Purpose |
| Brake Spoon | Turns the star wheel adjuster inside the drum |
| Star Wheel Adjuster | Adjusts brake shoe position |
| Brake Spring Pliers | Remove and install brake springs |
| Drum Brake Retaining Tool | Holds drum parts during adjustment |
Brake Cleaner And Wire Brush
Cleaning brake parts removes dust, dirt, and grease. Brake cleaner sprays dissolve contaminants fast. Wire brushes scrub away rust and buildup for a clean surface.
- Wear gloves and work in a well-ventilated area.
- Spray cleaner on the rotor or drum before brushing.
- Use a wire brush with stiff bristles for rust removal.
- Avoid getting cleaner on rubber parts.
Safety Gear For Diy Brake Repair
Working on brakes yourself can save money. Safety gear keeps you safe during the repair.
Brakes have dust and parts that can hurt your skin, eyes, and lungs. Use the right gear every time.
Protective Gloves
Gloves protect your hands from sharp parts and harmful dust. Use gloves that resist chemicals and cuts.
- Wear thick, chemical-resistant gloves
- Choose gloves with good grip for handling tools
- Replace gloves if they tear or wear out
- Wash hands after removing gloves
Eye Protection
Brake dust and small particles can damage your eyes. Always wear eye protection to stop this.
| Type | Protection Level | Best Use |
| Safety Goggles | High | Full seal around eyes |
| Safety Glasses | Medium | General protection |
| Face Shield | Extra | Protects face and eyes |
Respirator Mask
Brake dust can harm your lungs. A respirator mask filters harmful dust and particles.
Choose a mask that fits well and covers nose and mouth. Here are common types:
- N95 mask: filters 95% of small particles
- Half-face respirator: reusable with replaceable filters
- Full-face respirator: protects eyes and lungs
Choosing Quality Tools On A Budget
DIY brake repair needs good tools to work well and stay safe. Picking quality tools can be hard if you have a tight budget. You want tools that last but do not cost too much.
This guide will help you find the right balance between price and quality. You will learn about brand names, buying kits or single tools, and how to keep your tools working for a long time.
Brand Vs Generic Tools
Brand tools usually have better quality and last longer. They come with warranties and better customer service. But brand tools cost more money.
Generic tools cost less and might work fine for simple jobs. They can wear out faster and may not fit well. Think about how often you will use the tools before choosing.
- Choose brand tools for safety parts like brake calipers
- Use generic tools for less critical items like wrenches
- Check reviews to see if generic tools perform well
Tool Kits Vs Individual Purchases
Tool kits offer many tools in one package. They are often cheaper than buying tools separately. Kits are good if you need many tools at once.
Buying tools one by one lets you pick only what you need. It can save money if you already have some tools. You can buy better quality for each tool this way.
- Buy kits for beginner DIYers to get all basic tools
- Buy individual tools to replace or upgrade specific items
- Compare prices and tool quality before you buy
Maintenance Tips For Longevity
Good care helps your tools last longer and work better. Clean tools after each use to remove dirt and rust. Store them in a dry place to avoid damage.
Sharpen or lubricate moving parts when needed. Check tools often for wear or damage. Replace parts or tools if they become unsafe to use.
- Wipe tools clean after use
- Keep tools dry and in cases or boxes
- Oil moving parts like pliers and cutters
- Inspect tools regularly for cracks or rust
- Replace damaged tools to stay safe
Credit: cntopa.com
Common Mistakes To Avoid
Repairing your car brakes can save money and time. But mistakes happen if not careful.
Knowing common errors helps you avoid accidents and costly repairs.
Using Wrong Tools
Using the wrong tools can damage brake parts. This leads to unsafe driving conditions.
- Always use tools designed for brake repair.
- Avoid using makeshift tools.
- Check tool compatibility with your car model.
Skipping Safety Precautions
Safety is crucial when repairing brakes. Skipping safety steps can lead to accidents.
Essential Safety Precautions:
- Wear safety goggles and gloves.
- Ensure the car is on a stable surface.
- Use wheel chocks to prevent rolling.
Ignoring Manufacturer Guidelines
Each car has specific brake repair guidelines from the manufacturer. Ignoring these can void warranties.
| Car Make | Guideline Importance |
| Toyota | High |
| Ford | Medium |
| Honda | High |

Credit: www.oreillyauto.com
Frequently Asked Questions
What Are Essential Diy Brake Repair Tools?
Essential tools include a brake caliper tool, brake bleeder kit, wrenches, pliers, and a jack. These tools help you safely remove and replace brake components at home.
How Do Brake Caliper Tools Work In Repairs?
Brake caliper tools compress the caliper piston, making space for new brake pads. They ensure proper pad alignment and prevent damage during installation.
Can I Safely Repair Brakes Without Professional Tools?
Yes, with the right DIY brake repair tools and knowledge, you can safely perform basic brake repairs. Always follow safety guidelines and vehicle manuals.
What Is The Purpose Of A Brake Bleeder Kit?
A brake bleeder kit removes air from brake lines to maintain proper brake pressure. This ensures effective braking performance and safety after repairs.
Conclusion
DIY brake repair tools make fixing brakes easier and more affordable. Knowing each tool’s use helps you work safely and quickly. You can save money by doing simple brake repairs yourself. Always follow instructions to avoid mistakes and stay safe.
Practice patience and take your time with each step. With the right tools, brake maintenance becomes less stressful. Keep learning and improving your skills over time. Your car will thank you for the care you give. Simple tools, smart work, and safety first.
That’s the key to DIY brake repair success.


