
If you’ve ever struggled to get your tire to seal properly, you know how frustrating it can be. Using bead seating tools can make this task much easier and faster.
But if you’re new to these tools or unsure how to use them correctly, you might end up wasting time or even damaging your tire. You’ll discover simple, step-by-step tips to help you master bead seating tools. By the end, you’ll feel confident handling your tires like a pro—and avoid common mistakes that slow you down.
Keep reading to unlock the secrets that will save you effort and protect your gear.
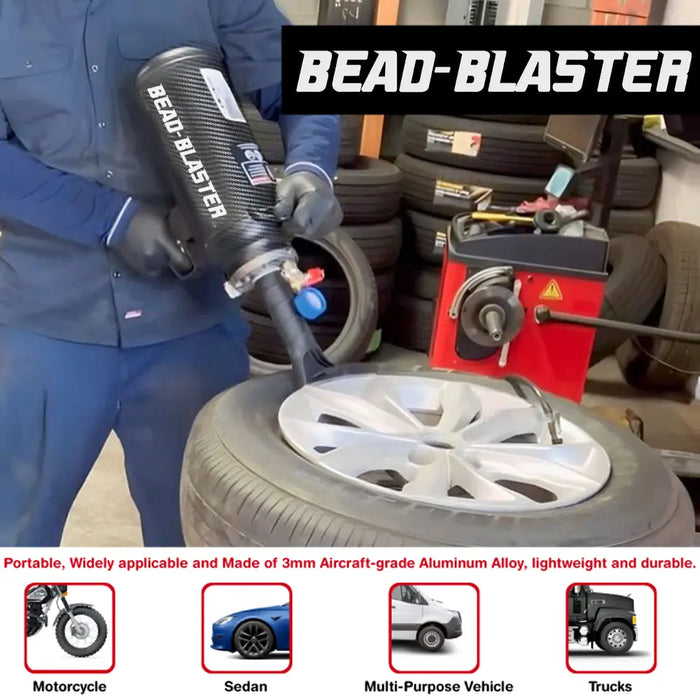
Choosing The Right Bead Seating Tool
Using a bead seating tool helps fit tires properly on rims. Picking the correct tool makes the job safer and easier.
Different tools work best for different tire types and sizes. Knowing which tool to use saves time and avoids damage.
Types Of Bead Seating Tools
There are several bead seating tools available. Each tool uses a different method to push the tire bead onto the rim.
- Air Blast Tools:Use a quick blast of air to seat the bead.
- Manual Lever Tools:Use a lever to push the bead into place.
- Inflator Tools:Combine inflating and bead seating in one tool.
- Bead Breakers with Seating Function:Tools that both break bead and help seat it.
Choosing between these depends on your equipment and the type of tires you work with.
Matching Tools To Tire Sizes
Different tire sizes need different bead seating tools. Small tires need less force than large tires.
Make sure the tool fits your tire’s diameter and width for safe use. Using the wrong tool can damage the tire or rim.
| Tire Size | Recommended Tool Type |
|---|---|
| Small (up to 14 inches) | Manual Lever Tools or Small Air Blast Tools |
| Medium (15 to 20 inches) | Inflator Tools or Medium Air Blast Tools |
| Large (over 20 inches) | Heavy-Duty Air Blast Tools or Bead Breakers with Seating |
Always check the tool’s specifications before use. This helps match the tool with your tire size safely.
Credit: www.nationalsupplys.com
Preparing Tires And Rims
Using bead seating tools correctly starts with preparing your tires and rims. Clean surfaces and check for damage to ensure a safe fit.
Proper preparation helps avoid leaks and makes the bead seat properly on the rim. Take your time for the best results.
Cleaning Bead And Rim Surfaces
Remove dirt, rust, and old tire residue from the bead and rim surfaces. Clean surfaces help the tire seal tightly and prevent air leaks.
- Use a wire brush to remove rust from the rim.
- Wipe the bead area with a clean cloth.
- Remove any old tire sealant or debris.
- Check that no grease or oil is on the rim or tire bead.
Checking For Damage Or Wear
Look closely at both the rim and tire bead for cracks, dents, or worn areas. Damage can cause poor bead seating or tire failure.
| Area | What to Check | Action Needed |
| Rim | Cracks, dents, rust spots | Repair or replace if needed |
| Tire Bead | Cracks, cuts, missing rubber | Replace the tire if damaged |
| Valve Stem Area | Corrosion, leaks | Clean and replace if leaking |
Setting Up The Work Area
Using bead seating tools requires a clean and organized space. Setting up your work area helps you work safely and efficiently.
Make sure you have enough light and room to move. This will make the process easier and more comfortable.
Safety Precautions
Safety is very important when working with bead seating tools. Protect yourself from sharp edges and flying debris.
Wear safety glasses and gloves to avoid injuries. Keep your work area free of clutter to prevent accidents.
- Always wear eye protection
- Use gloves to protect your hands
- Keep your workspace clean and clear
- Make sure tools are in good condition
- Work in a well-lit area
Organizing Tools And Equipment
Organize all tools and equipment before starting. This saves time and helps avoid frustration.
Arrange your bead seating tools, tire levers, and any other items in one place. Check that everything is clean and ready to use.
- Place all tools within easy reach
- Group similar tools together
- Use containers or trays to keep small parts safe
- Check tool condition before starting
- Keep a trash bin nearby for waste

Credit: www.youtube.com
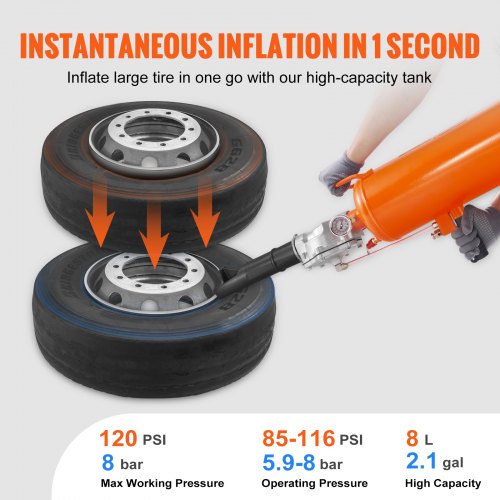
Using Air Compressors Effectively
Bead seating tools help fit tires onto rims by using air pressure. Using an air compressor correctly makes this job easier and safer.
Knowing how to control air pressure and flow ensures the bead seats properly without damage.
Recommended Air Pressure Levels
Use the right air pressure to seat the bead without causing harm. Too much pressure can burst the tire or damage the rim.
Start with a moderate pressure and increase slowly if needed. Most passenger tires seat well between 30 and 50 psi.
- Light trucks: 35 to 55 psi
- Passenger cars: 30 to 50 psi
- Motorcycles: 25 to 40 psi
Controlling Air Flow For Bead Seating
Control air flow to avoid sudden bursts that can damage the tire. Use valves or regulators to adjust the air supply.
Slow, steady air flow helps the tire bead seat evenly around the rim. Quick bursts can cause uneven seating or blowouts.
- Use a regulator to keep consistent air pressure.
- Open valves slowly to increase air flow gradually.
- Release air carefully to avoid rapid pressure changes.
Step-by-step Bead Seating Process
Using bead seating tools helps fit the tire bead onto the rim securely. This process ensures the tire holds air and stays safe while driving.
Follow the steps carefully to avoid damage to the tire or rim. Proper seating improves tire performance and safety.
Positioning The Tire And Rim
Place the rim on a clean, flat surface. Align the tire so the bead rests evenly around the rim edge. Make sure the tire and rim match in size.
- Check for any dirt or debris on the rim.
- Lubricate the tire bead with a suitable lubricant.
- Set the tire bead on the rim lip evenly.
- Ensure the tire is centered on the rim.
Inflating And Seating The Bead
Use a bead seating tool to help push the tire bead against the rim. Inflate the tire slowly to seat the bead properly. Do not exceed recommended pressure.
| Inflation Pressure | Purpose |
|---|---|
| 10-15 psi | Initial bead seating |
| 30-35 psi | Full bead seating and tire shaping |
| 35 psi (max) | Final check and adjustment |
Checking For Proper Seal
Inspect the tire and rim for leaks after seating. Use soapy water on the bead area to find bubbles. Make sure the tire holds pressure without dropping.
- Look for air bubbles in the soapy water test.
- Listen for hissing sounds around the bead.
- Check the tire pressure after 10 minutes.
- Repeat inflation if the bead is not sealed.
Credit: www.vevor.com
Troubleshooting Common Issues
Using bead seating tools can sometimes be tricky. Let’s explore solutions to common problems.
Follow these tips to fix issues like stubborn beads, air leaks, and uneven seating.
Dealing With Stubborn Beads
Stubborn beads can be frustrating. They may not fit easily onto the rim.
- Ensure the tire and rim are clean and free of debris.
- Use a lubricant to help the bead slide into place.
- Check if the tire is correctly aligned with the rim.
Fixing Air Leaks
Air leaks can prevent a proper seal. They often occur at the bead or valve area.
- Apply soapy water to identify leaks by spotting bubbles.
- Tighten the valve stem if it’s loose.
- Re-seat the bead by deflating and inflating the tire.
Adjusting For Uneven Seating
Uneven seating can cause vibrations. It affects the ride quality.
| Problem | Solution |
| Bead not centered | Reinflate the tire to a higher pressure. |
| Tire wobbles | Check for rim damage or debris. |
| Unbalanced tire | Use a tire balancer to correct. |
Maintaining Bead Seating Tools
Bead seating tools help inflate tires quickly. Proper maintenance ensures they work effectively. Let’s explore how to maintain them well.
Regular care extends the life of your bead seating tools. Follow these tips for best results.
Cleaning And Storage Tips
Keep bead seating tools clean to prevent damage. Dirt and debris can affect performance.
Store tools in a dry place. Moisture can lead to rust or other issues.
- Wipe tools with a clean cloth after each use
- Use mild soap for deep cleaning
- Ensure tools are completely dry before storing
Routine Inspections
Check bead seating tools regularly for wear and tear. Inspections help catch problems early.
Inspect hoses and connections for leaks or cracks. Replace damaged parts immediately.
- Check for air leaks around fittings
- Examine the valve for proper function
- Ensure safety features are intact
Tips From Experts
Bead seating tools help fit tires onto rims quickly and safely. Using them right saves time and prevents damage.
Experts share simple tips to speed up the seating process and protect your tires and rims during use.
Speeding Up The Seating Process
Prepare your workspace and tools before starting. A clean, organized area helps you work faster.
- Check the tire and rim size to match before seating.
- Use a lubricant around the bead area to ease fitting.
- Inflate the tire slowly and evenly to seat the bead properly.
- Use the bead seating tool according to the instructions.
- Keep a pressure gauge handy to avoid over or under-inflation.
Avoiding Damage To Tires And Rims
Protect your tires and rims by handling them carefully and using tools correctly. Damage can cause leaks and unsafe rides.
| Common Damage | How to Prevent |
|---|---|
| Scratches on rims | Use rim protectors or soft cloth during seating |
| Pinched tire beads | Avoid sharp tools and press beads gently |
| Overinflation | Use a pressure gauge and inflate slowly |
| Incorrect seating | Ensure tire and rim sizes match exactly |
Frequently Asked Questions
What Is A Bead Seating Tool Used For?
A bead seating tool helps mount tires onto rims by evenly seating the tire bead. It prevents damage and ensures a proper seal for safe driving.
How Do You Use A Bead Seating Tool Safely?
Inflate the tire slowly while holding the bead seating tool in place. Monitor pressure carefully to avoid over-inflation and tire damage.
Can Bead Seating Tools Work On All Tire Types?
Most bead seating tools work on various tire types, including car, truck, and bike tires. Always check compatibility before use for best results.
Why Is Bead Seating Important In Tire Installation?
Proper bead seating ensures an airtight seal between tire and rim. It prevents leaks, improves safety, and prolongs tire life during use.
Conclusion
Using bead seating tools makes tire work easier and safer. These tools help fit the tire bead tightly on the rim. Proper use prevents air leaks and improves tire performance. Always follow the instructions and take your time. Practice will help you gain confidence quickly.
Keep your tools clean and in good shape. This simple step saves time and avoids problems later. Bead seating tools are valuable for anyone handling tires. Try them out and see the difference in your tire jobs.


