
Are you tired of the harsh glare from the sun while driving? Or maybe you want to add a sleek, stylish look to your car?
Tinting your car windows could be the perfect solution. But how do you do it right without spending a fortune or making mistakes that cost you more? In this guide, you’ll discover simple, step-by-step tips to tint your car windows like a pro.
By the end, you’ll feel confident to take on the job yourself and enjoy cooler, safer rides every time you hit the road. Keep reading to learn how easy it can be to transform your car with window tinting.
Credit: protexcanada.com
Benefits Of Window Tinting
Window tinting changes the look and function of car windows. It adds a dark film that blocks light.
Many people tint their windows for several useful reasons. It helps with comfort, safety, and style.
Enhancing Privacy
Tinted windows make it harder for people to see inside your car. This keeps your belongings safe.
Privacy helps you feel more secure. It also stops curious eyes from watching you or your passengers.
Reducing Heat And Glare
Tints block a lot of sunlight. This lowers the heat inside the car on hot days.
They also reduce glare from the sun and headlights. This makes driving safer and more comfortable.
- Keeps car cooler in summer
- Reduces eye strain from bright light
- Improves visibility while driving
Protecting Interior And Skin
Window tint blocks harmful UV rays from the sun. This protects your skin from damage and sunburn.
Tinted windows also help stop fading and cracking inside your car. Your seats and dashboard stay newer longer.
- Reduces risk of skin cancer
- Prevents interior wear and tear
- Keeps upholstery colors bright
Types Of Window Tint Films
Car window tints come in different types. Each type has unique features and benefits.
Choosing the right tint helps with heat control, privacy, and looks. Let’s explore the main types.
Dyed Tint
Dyed tint uses a layer of dye to block sunlight. It reduces glare and adds privacy.
This tint is affordable and easy to apply. But it may fade or bubble over time in strong sun.
Metalized Tint
Metalized tint has tiny metal particles inside the film. These particles reflect heat and UV rays.
This type is strong and lasts longer. It also improves window strength but can cause signal interference.
Ceramic Tint
Ceramic tint uses ceramic particles to block heat and UV rays. It does not fade or change color.
This tint offers excellent heat reduction without affecting signals. It is more expensive but very durable.
Hybrid Tint
Hybrid tint combines dyed and metalized layers. It blocks heat and reduces fading better than dyed tint.
This type balances cost and performance. It offers good heat control and a natural look.
Tools And Materials Needed
Tinting car windows needs the right tools and materials. Using the proper items helps get a smooth finish.
This guide lists the essential tools and materials you need to tint your car windows at home.
Tint Film And Cutting Tools
Tint film is the main material used to darken your windows. Choose film that fits your car’s glass size and local laws.
Cutting tools help shape the tint film to fit each window perfectly. You need sharp tools for clean cuts.
- Tint film roll or sheets
- Utility knife or precision cutting blade
- Scissors for rough cuts
- Cutting mat or flat surface
Cleaning Supplies
Clean windows help the tint stick better. Use cleaning supplies to remove dirt, dust, and oil from the glass.
Good cleaning ensures the tint lasts longer without bubbles or peeling.
- Glass cleaner or rubbing alcohol
- Lint-free microfiber cloths
- Paper towels
- Spray bottle with water and soap mix
Application Tools
Application tools help apply the tint film smoothly and remove air bubbles. These tools make the tint look professional.
Use the right tools to press and trim the film after placing it on the window.
- Spray bottle with water and a few drops of soap
- Plastic squeegee or credit card wrapped in soft cloth
- Heat gun or hair dryer (for shaping film)
- Lint-free cloth for drying and cleaning edges

Credit: www.youtube.com
Preparing The Car Windows
Before tinting your car windows, proper preparation is key. It helps the film stick well and last longer.
Take your time cleaning and measuring. This makes the tint look smooth and neat.
Cleaning The Surface
Clean the windows thoroughly. Dirt and dust can cause bubbles under the tint film.
- Use a glass cleaner that leaves no residue.
- Wipe with a lint-free cloth or paper towel.
- Scrape off any stuck debris gently with a razor blade.
- Make sure to clean window edges and corners.
Removing Old Tint
Old tint can ruin the new film’s look. Remove it fully before applying the new one.
Use a heat gun or hairdryer to soften the old tint adhesive. Peel the film slowly from one corner.
| Tool | Purpose |
|---|---|
| Heat Gun | Softens old tint for easy removal |
| Razor Blade | Scrapes off leftover adhesive |
| Glass Cleaner | Cleans the window after removal |
Measuring And Cutting Film
Measure each window carefully. Cut the film a little bigger than the glass size.
- Use a tape measure for exact window dimensions.
- Mark the film with a washable marker.
- Cut the film using sharp scissors or a utility knife.
- Keep the film flat to avoid wrinkles.
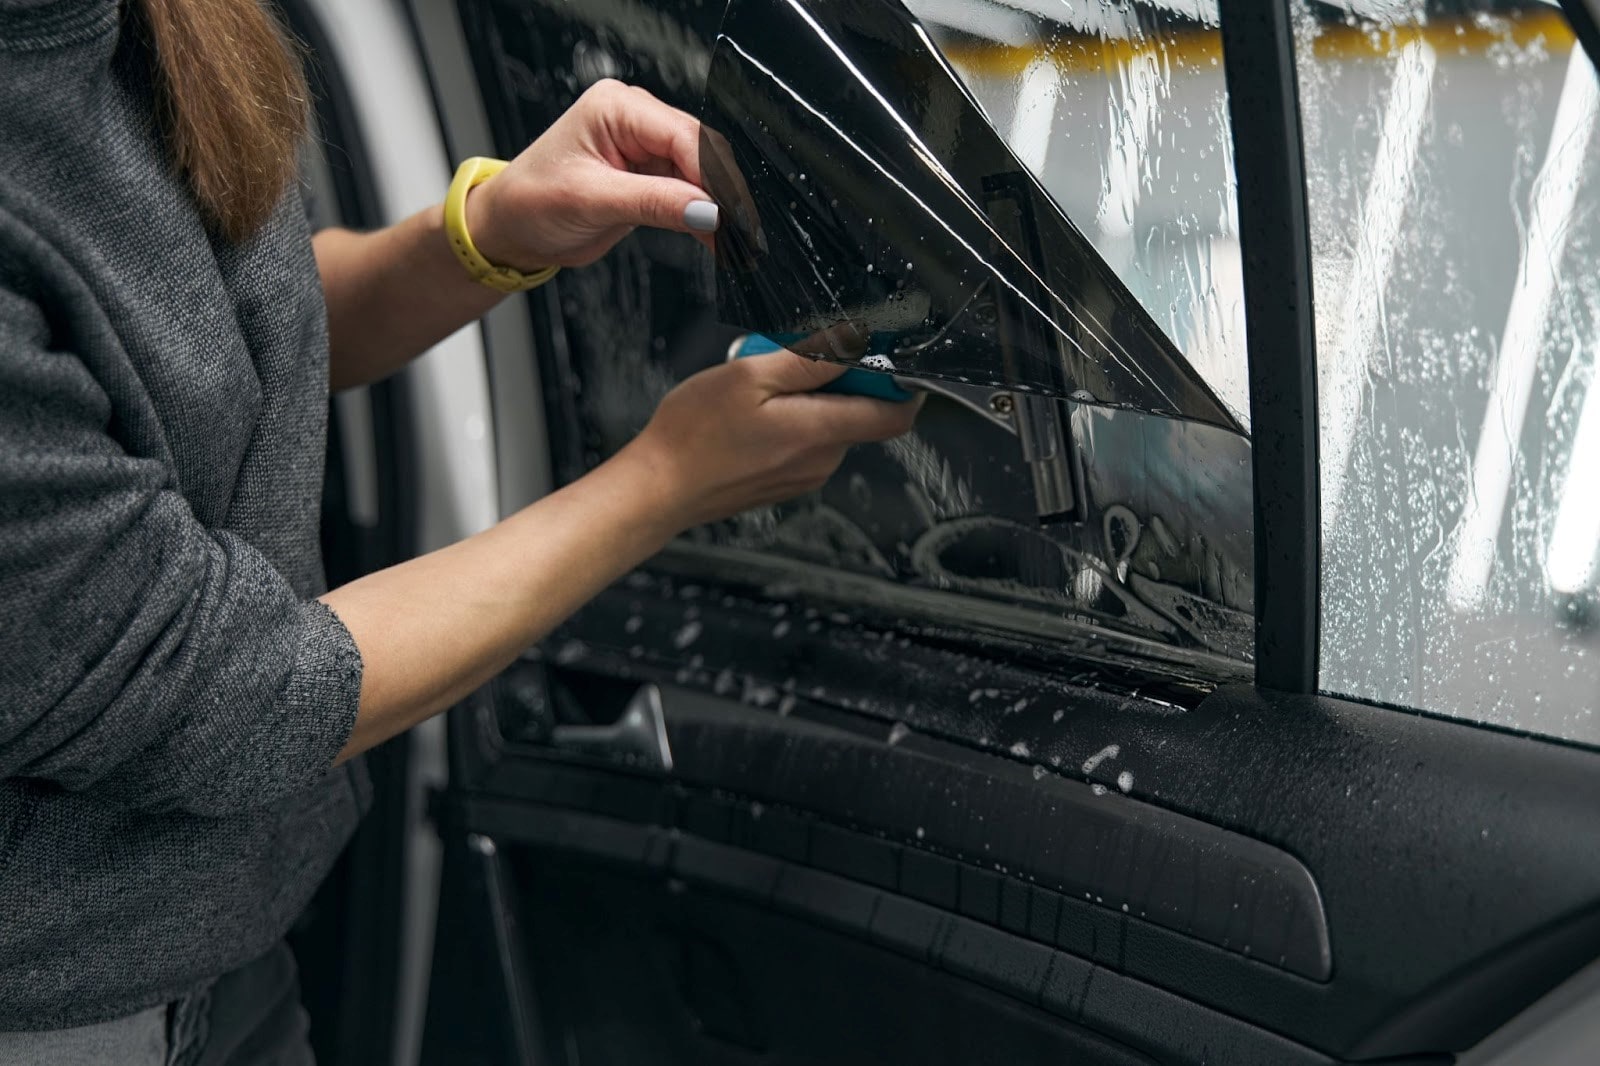
Step-by-step Tint Application
Tinting car windows can reduce glare and heat inside your vehicle. It also adds privacy and protects the interior. Follow these steps carefully for a smooth tint application.
Make sure your workspace is clean and dust-free. Gather all tools and materials before starting.
Applying Soapy Water
Mix a few drops of dish soap with water in a spray bottle. Spray the solution evenly on the inside of the car window. This helps the tint film slide into place.
Positioning The Film
Peel the backing off the tint film carefully. Place the sticky side of the film on the wet window. Adjust it until it covers the glass perfectly.
- Start from one edge and slowly lay the film down.
- Keep the film wet to move it easily.
- Align edges with the window frame.
- Check for wrinkles or misplacement.
Squeegeeing Out Bubbles
Use a plastic squeegee to press the film onto the glass. Push water and air bubbles toward the edges to remove them. Work slowly and gently to avoid tears.
| Common Bubble Issues | Fix |
|---|---|
| Small bubbles | Press harder with squeegee |
| Large bubbles | Lift film gently and reapply |
| Water trapped inside | Use squeegee to push water out |
Trimming Excess Film
After the film fits the window well, trim the extra edges. Use a sharp utility knife for clean cuts. Take care not to scratch the glass or cut too much.
Common Mistakes To Avoid
Tinting car windows can improve privacy and block UV rays. But mistakes can ruin your work. Avoid these common errors for best results.
Proper technique and quality materials are key. Learn what not to do when tinting car windows.
Ignoring Proper Cleaning
Dirty windows can lead to poor tint application. Dust and grime cause bubbles and peeling.
Always clean windows thoroughly before tinting. Use a suitable cleaner and lint-free cloth.
- Remove all dirt and grease
- Check for tiny particles
- Dry windows completely
Rushing The Application
Rushing can cause mistakes like uneven edges. Take your time to align the film carefully.
Ensure each section is smooth before moving on. Patience leads to a professional look.
- Align the film slowly
- Smooth out air bubbles
- Double-check all edges
Using Low-quality Film
Cheap film can fade or peel over time. Invest in good quality for lasting results.
Quality film offers better UV protection and clarity. It also looks more professional.
- Research top brands
- Check reviews for durability
- Compare UV protection levels
Legal Considerations For Tinting
Car window tinting is popular for privacy and protection. But, it’s important to know the laws before you tint your windows.
Each state has different rules for tinting. Understanding these can help you avoid fines.
Tint Darkness Regulations
Each state sets its own limit for tint darkness. This is often measured by Visible Light Transmission (VLT) percentage.
The lower the VLT, the darker the tint. Check your state’s VLT requirements before tinting.
- Front windows often have stricter limits
- Back windows may allow darker tints
- Windshields usually have restrictions
Visibility Requirements
Safety is a key concern with window tinting. Tints should not block your view of the road.
Some states require a certain level of visibility. This ensures drivers can see clearly in different conditions.
- Ensure tint does not obstruct your view
- Check for any visibility tests required
- Consider your night driving needs
State And Local Laws
State laws can vary greatly. Local laws may also affect your tint options.
Always research both state and local regulations. This helps you comply with all legal requirements.
- Check state government websites for details
- Consult local authorities if unsure
- Consider professional advice for legal compliance

Credit: www.absolutetinting.ca
Maintaining Tinted Windows
Keeping your car’s tinted windows in good shape helps them last longer. Proper care keeps the tint clear and protects it from damage.
Follow simple steps to clean and protect your tinted windows. Check the tint regularly to know when it needs replacing.
Cleaning Tips
Use soft cloths or sponges to clean tinted windows. Avoid rough materials that can scratch the tint film.
Choose gentle cleaning solutions without ammonia. Ammonia can damage the tint and cause bubbles or peeling.
- Use a mild soap or special tint-safe cleaner
- Spray cleaner on the cloth, not directly on the window
- Wipe gently in circular motions
- Dry with a clean microfiber cloth
Avoiding Damage
Protect tinted windows from sharp objects or heavy impacts. Scratches and tears can ruin the tint’s look and function.
Do not roll down windows too fast after tinting. Let the tint cure for the time recommended by the installer.
- Keep pets’ claws away from windows
- Avoid using harsh chemicals like ammonia or bleach
- Park in shaded areas to reduce heat damage
- Do not stick stickers or tape on the tint
When To Replace Tint
Look for bubbles, peeling edges, or discoloration on your tinted windows. These signs mean it is time to replace the tint.
Old tint can reduce visibility and block less heat. Replacing it keeps your car comfortable and safe.
- Peeling or lifting from the glass
- Blurry or cloudy appearance
- Cracks or scratches that do not clean
- Loss of heat-blocking ability
Frequently Asked Questions
What Tools Do I Need To Tint Car Windows?
You need window tint film, a spray bottle with soapy water, a squeegee, a utility knife, and a heat gun. These tools help you clean, cut, apply, and smooth the tint evenly on your car windows.
How Long Does Car Window Tinting Take?
Tinting usually takes 1 to 3 hours depending on window size and experience. Proper application requires patience to avoid bubbles and wrinkles for a flawless finish.
Is Window Tinting Legal For All Cars?
Window tint laws vary by state and country. Check local regulations for allowed tint darkness and reflectivity before tinting to avoid fines or removal orders.
Can I Tint Car Windows Myself?
Yes, DIY tinting is possible with the right tools and patience. Follow instructions carefully to achieve professional results and avoid costly mistakes or damage.
Conclusion
Tinting car windows adds privacy and blocks harmful sun rays. It also keeps your car cooler on hot days. Make sure to follow local laws about tint darkness. Choose the right tint for your needs and budget. Proper installation helps avoid bubbles and peeling.
Regular care keeps the tint looking good for years. Enjoy a more comfortable and stylish ride every day. Simple steps can make a big difference in your driving experience. Try it and see the benefits for yourself.


