
Have you ever looked at your car windows and thought, “I need to get this tint off”? Removing car tint can seem tricky, but it doesn’t have to be.
Whether your tint is peeling, damaged, or you just want a fresh look, this guide will help you get it done quickly and safely. You’ll learn simple steps to remove the tint without harming your windows. Keep reading, and by the end, you’ll feel confident handling this task yourself—saving time and money.
Let’s dive in and make your car windows clear again!

Credit: www.youtube.com
Tools And Materials Needed
Removing car tint from windows requires the right tools. Using proper materials makes the job easier and safer.
This guide covers both essential and optional supplies you might need for tint removal.
Essential Supplies
These basic tools help you remove the tint film efficiently without damaging the window.
- Spray bottle filled with soapy water
- Plastic razor blade or scraper
- Clean microfiber cloths
- Glass cleaner
- Heat gun or hair dryer
- Utility knife
Optional Items For Tough Jobs
For difficult tint jobs, extra tools can make the process faster and more effective.
| Item | Purpose |
| Ammonia solution | Softens adhesive for easier removal |
| Plastic scraper with curved edge | Reaches corners without scratching glass |
| Gloves | Protect hands from chemicals and heat |
| Trash bags or plastic sheets | Cover car interior to prevent damage |
| Adhesive remover spray | Clears leftover glue from the glass |
Preparing Your Workspace
Removing car tint requires a clean and organized workspace. Prepare your area to make the process easier and safer.
Good preparation helps protect your car and tools while you work on the windows.
Choosing The Right Location
Pick a place with enough space to move around your car freely. Avoid tight spots to prevent damage to the vehicle.
- Work in a shaded area to keep the tint adhesive soft.
- Choose a flat surface to park your car.
- Ensure good lighting for better visibility.
- Avoid dusty or windy places to keep dirt away.
- Have easy access to power if using heat tools.
Protecting Your Car Interior
Cover seats and surfaces to stop water or chemicals from causing damage. Use old towels or plastic sheets for protection.
| Item | Protection Needed | Material Used |
| Seats | Prevent stains and water damage | Old towels or plastic covers |
| Dashboard | Shield from heat and cleaning sprays | Plastic wrap or cloth covers |
| Floor | Catch dirt and adhesive residue | Cardboard or drop cloth |
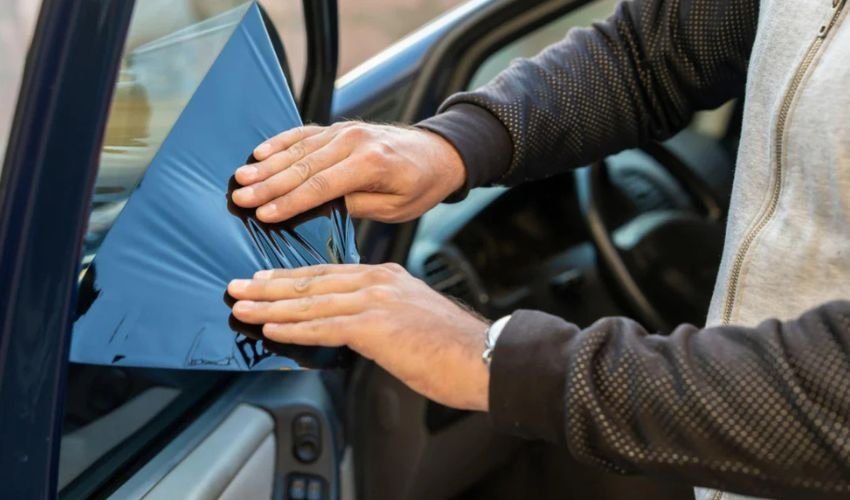
Removing The Tint Film
Removing car window tint needs patience and care. The tint film sticks tightly to the glass.
Using heat helps soften the glue. Then you can peel the film off without damage.
Using Heat To Loosen Adhesive
Apply heat to the window tint with a heat gun or hair dryer. Keep the heat moving to avoid damage.
The heat melts the glue under the film. This makes the tint easier to remove in one piece.
- Hold the heat source 6-8 inches from the glass
- Move it slowly across the tinted area
- Heat for about 2-3 minutes per section
- Wear gloves to protect your hands from heat
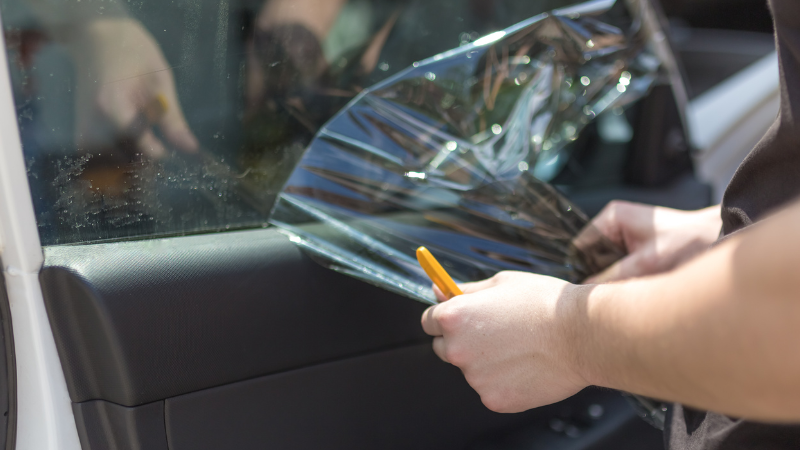
Peeling Off The Film Carefully
Start peeling the tint at a corner or edge. Pull slowly and evenly to avoid tearing.
If the film resists, apply more heat. Keep the surface clean to see your progress clearly.
- Lift the film slowly from the glass
- Use a plastic scraper if needed to loosen edges
- Do not rush to avoid scratches or leftover glue
- Clean the window after removal to clear residue
Cleaning Residual Adhesive
Removing car tint often leaves sticky residue on the windows. Cleaning this residue is important for a clear finish. Using the right methods helps avoid damage to the glass.
This guide covers how to apply adhesive remover and scrape off stubborn residue safely and effectively.
Applying Adhesive Remover
Choose a safe adhesive remover designed for automotive glass. Test it on a small area first to check for any damage. Apply the remover evenly over the sticky spots.
- Wear gloves to protect your hands.
- Use a clean cloth to apply the remover.
- Let the remover sit for 5 to 10 minutes.
- Avoid letting the remover dry on the glass.
- Work in a well-ventilated area.
Scraping Off Stubborn Residue
After applying the remover, use a plastic scraper to lift the softened adhesive. Avoid metal tools to prevent scratches. If residue remains, repeat the process carefully.
| Tool | Purpose | Tips |
|---|---|---|
| Plastic scraper | Remove softened adhesive | Use gentle pressure |
| Razor blade (optional) | For very tough residue | Hold at a low angle, use carefully |
| Microfiber cloth | Clean glass after scraping | Use with glass cleaner |
Final Cleaning And Polishing
After removing car tint, the windows need a good cleaning. This ensures a clear view and a polished look.
It is important to clean and polish the windows properly. This will remove any leftover adhesive and make them shine.
Washing The Window Surface
Start by washing the window surface with soap and water. This helps to remove any dust or dirt.
Use a microfiber cloth to gently scrub the glass. This will prevent scratches and leave the surface clean.
- Mix a mild soap with warm water
- Dip the cloth in the soapy water
- Wipe the window in circular motions
- Rinse with clean water
- Dry the window with a clean towel
Polishing For A Crystal Clear Finish
Polishing is the final step to achieve a crystal clear finish. It enhances the shine and removes any streaks.
Apply a small amount of glass polish to a soft cloth. Buff the window in small circles for the best results.
- Use a high-quality glass polish
- Apply polish with a soft, clean cloth
- Buff in circular motions until clear
- Check for streaks and polish again if needed
Credit: fixitautoglass.ae
Tips For A Smooth Removal
Removing car tint from windows can be tricky. It takes patience and the right tools. Doing it wrong may damage your glass or leave sticky residue.
These tips help you remove tint safely and cleanly. Follow them to avoid common problems and handle tough tint types well.
Avoiding Common Mistakes
Many people rush the tint removal process. This can cause scratches or leftover glue. Use gentle heat and avoid sharp tools on the glass.
- Do not peel tint too fast; it can tear easily.
- Use a heat gun or hair dryer to soften adhesive before scraping.
- Never use metal scrapers without heat; glass may crack.
- Clean the window after removal to get rid of all glue residue.
- Work in a well-lit, dust-free area for better results.
Handling Difficult Tint Types
Some tint films are harder to remove than others. Metalized or thick tints may need extra care and stronger solvents.
| Type of Tint | Recommended Removal Method | Notes |
| Dyed Tint | Heat and gentle scraping | Usually easier to remove |
| Metalized Tint | Use ammonia solution and heat | May require longer soaking |
| Carbon Tint | Heat and adhesive remover | Less likely to leave residue |
| Ceramic Tint | Heat and careful scraping | Fragile; avoid harsh chemicals |
Credit: carlikefilm.com
Frequently Asked Questions
How Long Does It Take To Remove Car Window Tint?
Removing car window tint typically takes 1 to 3 hours. It depends on the tint type and removal method used. Professional removal is faster and less risky for window damage. DIY methods may take longer and require patience for best results.
What Tools Are Needed To Remove Car Tint Safely?
You need a heat gun or hair dryer, razor blade, and soapy water. These tools help soften the adhesive and scrape the tint off gently. Using proper tools prevents glass scratches and ensures a clean removal process.
Can I Remove Car Tint Without Damaging The Glass?
Yes, by heating the tint and peeling it slowly. Avoid sharp tools that can scratch the glass. Using adhesive removers and patience helps protect the window surface. Proper technique ensures damage-free tint removal.
Is It Better To Remove Car Tint Professionally?
Professional removal is safer and faster with specialized tools. Experts avoid glass damage and adhesive residue. DIY removal can be cost-effective but risks scratches or incomplete removal. Professionals ensure a clean, smooth window finish.
Conclusion
Removing car tint from windows can be simple with the right steps. Use heat and patience to peel off the film carefully. Clean the glass well to remove leftover adhesive. Avoid sharp tools to protect your windows from scratches. Taking your time helps prevent damage and gives clear results.
This process saves money compared to professional removal. Now, your windows look fresh and clear again. Try these tips for a smooth and easy tint removal.


