
Have you ever wondered if your tires are properly seated before hitting the road? Knowing how to check tire bead seating can save you from unexpected flats, poor handling, and costly repairs.
If you want to make sure your tires are safe and secure, this guide is for you. By the end, you’ll learn simple steps to spot a well-seated tire and avoid common mistakes that many drivers overlook. Keep reading to protect your ride and enjoy a smoother, safer drive every time.
Tools Needed
Checking tire bead seating is important for safety and performance. You need the right tools to do this task well.
Using proper tools helps you find if the tire is properly seated on the rim. This guide shows what tools you need.
Essential Equipment
You need some basic equipment to check tire bead seating. These tools help you see and measure the fit of the tire on the rim.
- Tire pressure gauge – checks air pressure inside the tire
- Soapy water spray – helps spot leaks and bead seating
- Air compressor or pump – inflates the tire to the correct pressure
- Flashlight – lights up dark areas for better inspection
- Rim protector – keeps the rim safe while working on the tire
Safety Gear
Safety gear keeps you protected while checking the tire bead seating. Always wear the right items to avoid injuries.
- Gloves – protect your hands from sharp edges and dirt
- Safety glasses – shield your eyes from debris and splashes
- Closed-toe shoes – protect feet from heavy tools or wheels
- Long sleeves – prevent scrapes on your arms
Preparing The Tire And Rim
Proper preparation of the tire and rim is essential for checking tire bead seating. This step ensures the tire fits correctly and safely on the rim. Clean and inspect both parts before mounting the tire.
Focus on cleaning the bead area and inspecting for damage. These actions help prevent leaks and unsafe conditions.
Cleaning The Bead Area
Remove dirt, rust, and old sealant from the bead area on both the rim and the tire. A clean surface helps the tire seat properly and creates an airtight seal.
- Use a wire brush or cloth to clean the rim bead seat.
- Check the tire bead for dirt or debris and wipe it clean.
- Remove any old tire lubricant or sealant residue.
- Ensure the surface is dry before installing the tire.
Inspecting For Damage
Check both the rim and tire bead area for any signs of damage. Damage can cause poor seating and air leaks.
| Component | What to Look For | Why It Matters |
|---|---|---|
| Rim Bead Seat | Cracks, dents, rust, bends | Can prevent proper tire sealing |
| Tire Bead | Cracks, cuts, missing wires | May cause leaks or tire failure |
| Valve Stem Area | Damage or corrosion | Affects air retention |
Mounting The Tire
Mounting a tire properly is important for safety and performance. It ensures the tire fits tightly on the rim. This guide explains how to check tire bead seating during mounting.
We focus on two key parts: aligning the tire correctly and seating the bead. Follow these steps to mount your tire with confidence.
Aligning The Tire Correctly
Start by placing the tire on the rim so it aligns evenly. Proper alignment prevents leaks and uneven wear. Make sure the tire’s directional arrows, if any, point the right way.
- Check the tire label for rotation direction.
- Place the tire bead evenly around the rim.
- Avoid twisting or stretching the tire during fitting.
- Ensure the tire sits flush with the rim edge all around.
Seating The Bead
The bead is the tire’s edge that locks onto the rim. Proper seating is vital to avoid air leaks and keep the tire stable. Inflate the tire slowly while checking the bead.
| Action | What to Check | Tip |
| Inflate the tire | Bead should pop into place all around | Use a moderate air pressure |
| Inspect the bead line | Bead should sit evenly on rim edge | Look for gaps or uneven spots |
| Adjust if needed | Push bead gently into rim if loose | Do not use sharp tools |
Credit: www.bikemag.com
Visual Inspection Techniques
Checking the tire bead seating is important for safety and performance. Visual inspection helps find problems before driving.
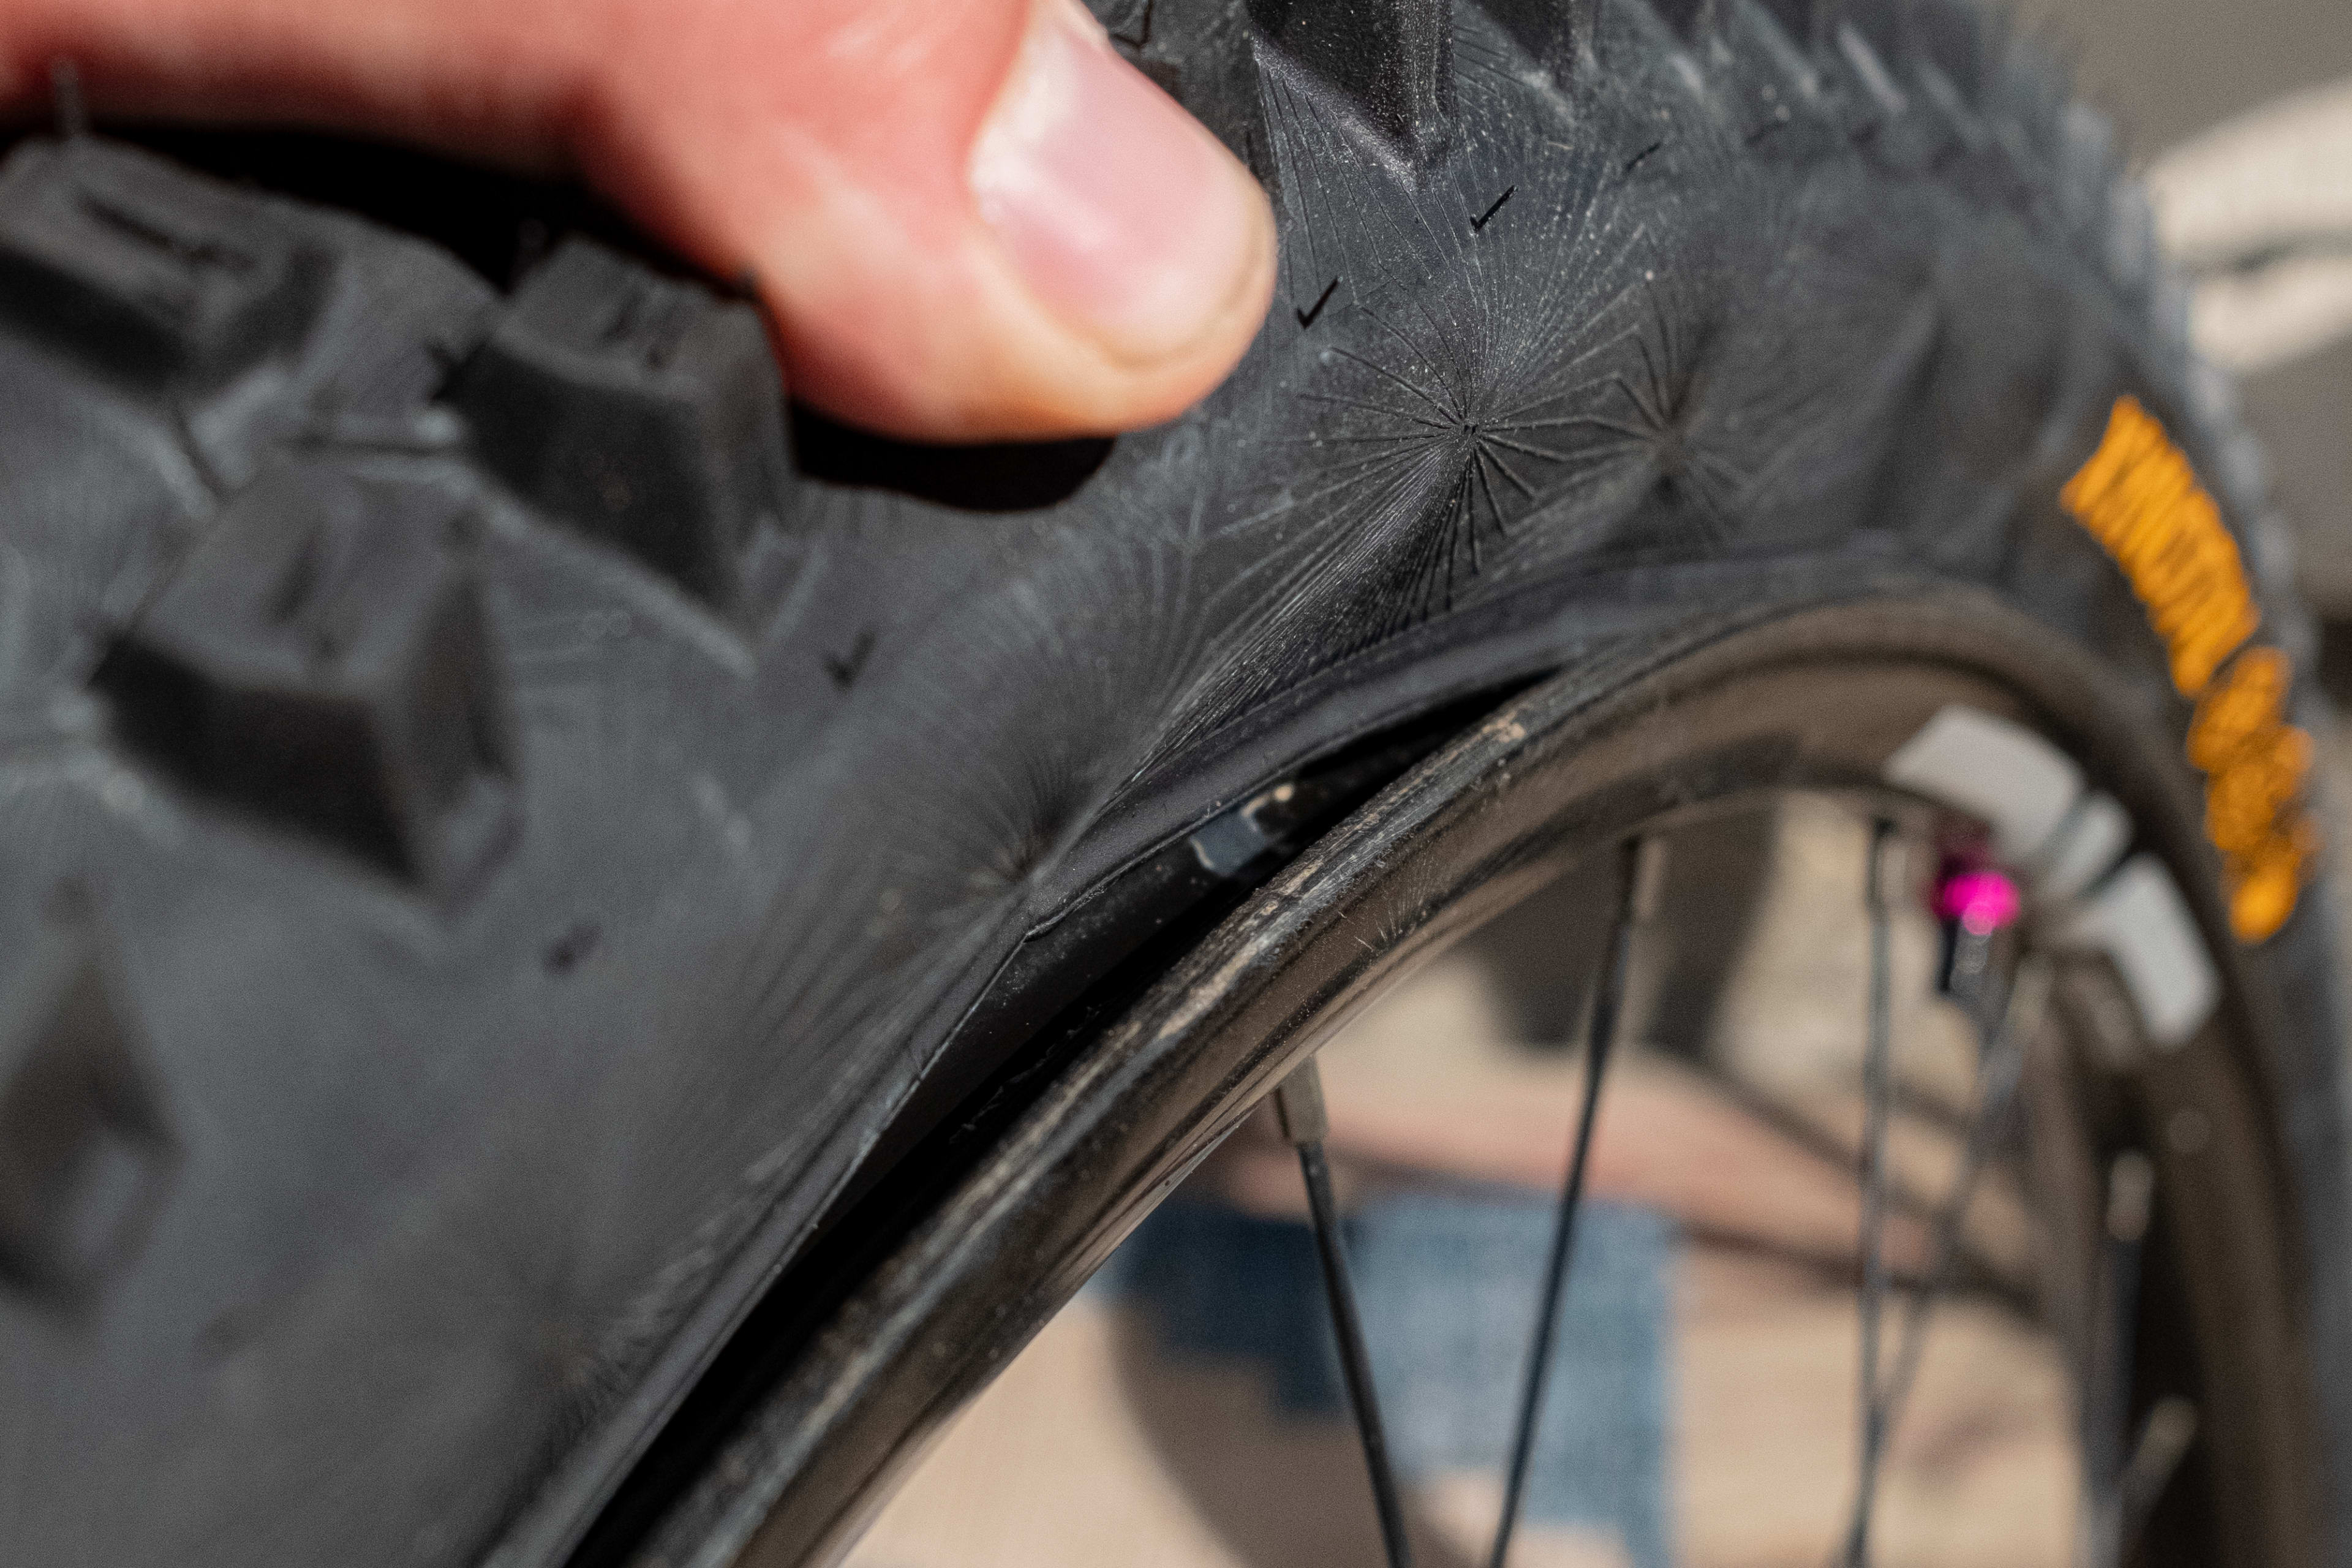
Look closely at the tire where it meets the rim. This area is called the bead seating line.
Checking Bead Seating Lines
Examine the bead seating line for a clear, even fit all around the rim. The line should be uniform without breaks.
- Clean the rim and tire edge before inspection
- Use good lighting to see the bead seating line clearly
- Check both sides of the tire for even seating
- Look for any bulges or irregular shapes along the bead line
Identifying Gaps Or Uneven Seating
Gaps or uneven seating can cause air leaks or tire damage. Spotting these issues early is key.
| Signs of Uneven Seating | What to Do |
| Visible gap between bead and rim | Deflate tire and reseat bead |
| Bead line uneven or wavy | Rotate tire slowly and check seating again |
| Air pressure drops quickly | Inspect bead area for damage or debris |
| Bulging or misshapen bead area | Replace tire if damage is severe |
Using Air Pressure
Checking tire bead seating is important for safety. Using air pressure helps make sure the tire fits correctly on the rim.
You can tell if the tire bead is seated by inflating the tire and listening for signs of leaks or poor fit.
Inflating To The Recommended Psi
Start by inflating the tire slowly to the recommended PSI. This pressure is usually shown on the tire sidewall or in the vehicle manual.
Inflating too fast can cause damage or unsafe seating. Use a reliable pressure gauge to check the air pressure accurately.
Listening For Leaks
After inflating, listen closely around the tire bead area. You might hear hissing sounds if air is leaking.
Check the entire rim edge to make sure the bead seals tightly. No leaks mean the tire is seated well and safe to use.
Final Checks
Checking your tire bead seating is important for safety. Make sure everything is correct before driving.
Properly seated tires help in maintaining vehicle stability. Follow these steps to ensure everything is in place.
Re-inspecting Bead Seating After Inflation
After inflating the tire, check if the bead is seated correctly. This will help in preventing air leaks and tire blowouts.
- Look for any visible gaps between the tire and rim.
- Ensure the bead line is evenly spaced all around the wheel.
- Listen for any hissing sounds indicating air leaks.
Ensuring Proper Tire Alignment
Tire alignment affects vehicle handling and tire wear. Check the alignment to ensure smooth driving.
| Alignment Check | Recommended Frequency |
| Tire Tread Wear | Monthly |
| Vehicle Drift | As needed |
| Steering Vibration | As needed |
Common Issues And Fixes
Checking tire bead seating is important for safe driving. Improper bead seating can lead to various problems.
Learn how to identify common issues and how to fix them. This guide will help ensure your tires are properly seated.
Bead Not Seating Properly
When the bead does not seat properly, the tire may wobble. This can cause uneven wear and reduce tire life.
Improper seating can happen due to dirt or debris on the rim. Ensure the rim and bead area are clean before mounting.
- Clean the rim thoroughly before mounting the tire.
- Check for any damage on the rim or tire bead.
- Use a proper tire mounting lubricant.
Dealing With Air Leaks
Air leaks are common if the bead is not sealed well. This can cause tires to lose air pressure quickly.
To fix air leaks, inspect the tire and rim for any visible damage. Use soapy water to find small leaks around the bead area.
- Apply soapy water to find leaks, look for bubbles.
- Re-seat the tire bead if leaks are found.
- Consider using a bead sealer for a better seal.

Credit: www.reddit.com

Credit: www.reddit.com
Frequently Asked Questions
How Do I Know If My Tire Bead Is Seated Properly?
You can check tire bead seating by inspecting the bead line around the rim. It should be evenly aligned and flush with the rim. Look for a continuous bead line without gaps or bulges to ensure proper seating and prevent air leaks.
What Tools Help Check Tire Bead Seating Accurately?
A tire pressure gauge and visual inspection are key tools. The gauge confirms correct inflation pressure, while a good light helps spot bead alignment on the rim. Together, they ensure the tire bead is fully and correctly seated.
Can Uneven Bead Seating Cause Tire Problems?
Yes, uneven bead seating can cause air leaks, vibrations, and uneven tire wear. It may also lead to poor handling and safety risks. Ensuring proper bead seating is crucial for tire performance and vehicle safety.
How Long Should I Wait After Inflating To Check Bead Seating?
Wait about 10-15 minutes after inflating to let the bead settle. This time allows the tire to fully seat on the rim, ensuring accurate inspection and preventing false readings from initial pressure changes.
Conclusion
Checking tire bead seating is important for safe driving. Proper seating keeps air inside the tire. It also helps the tire fit well on the rim. Always inspect the bead area carefully after mounting. Use simple tools like a soapy water spray to spot leaks.
A well-seated tire prevents accidents and uneven wear. Take your time and be patient during the process. Safe tires mean safer trips for you and your passengers. Keep this tip in mind every time you change or check your tires.


