
Are your car headlights looking dull or cloudy? You might not realize it, but dirty or foggy headlights can make driving at night risky and uncomfortable.
If you want your headlights to shine bright again and improve your safety on the road, cleaning them is easier than you think. In this guide, you’ll discover simple, effective ways to restore your headlights to their clear, original state.
Keep reading—you’ll be surprised how quickly you can bring back that bright, clear glow and drive with confidence again.
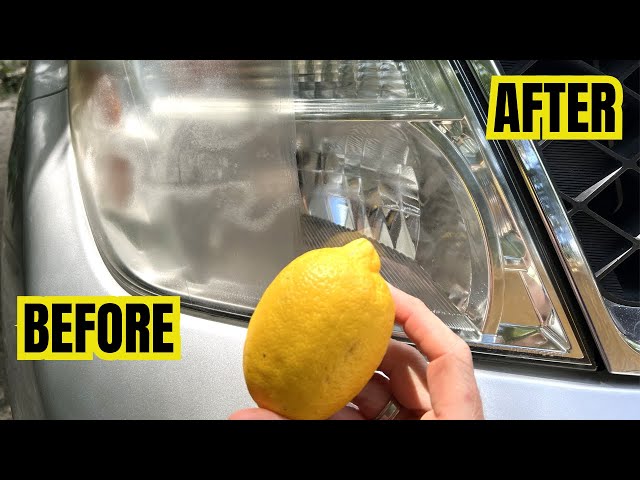
Credit: www.youtube.com
Causes Of Headlight Cloudiness
Car headlights can become cloudy over time. This cloudiness makes the lights dim and less effective. Understanding the causes helps you protect and clean them better.
Several factors cause headlight cloudiness. These include sunlight, dirt, and chemical changes on the plastic surface.
Effects Of Uv Exposure
Ultraviolet (UV) rays from the sun break down the headlight lens. The plastic fades and turns yellow or cloudy. This damage happens because UV light changes the plastic molecules.
- Plastic surface becomes brittle
- Yellowish tint appears
- Light transmission reduces
- Surface develops a rough texture
Impact Of Road Debris And Dirt
Driving exposes headlights to dirt, dust, and small stones. These materials scratch and wear the plastic. Over time, this causes visible haze and damage.
| Type of Debris | Effect on Headlight |
| Dust and Dirt | Builds up and blocks light |
| Small Stones | Cause tiny scratches |
| Insects and Sap | Leave sticky residues |
Role Of Oxidation
Oxidation happens when oxygen reacts with the headlight plastic. It forms a cloudy layer that blocks light. This layer is hard to remove without cleaning products.
Signs of oxidation:
- Cloudy or milky appearance
- Faded color on the lens
- Reduced brightness
Tools And Materials Needed
Cleaning your car headlights makes them clear and bright again. Using the right tools helps you do the job well.
This guide shows you the basic tools and materials to clean your headlights safely and effectively.
Cleaning Agents
Cleaning agents remove dirt, grime, and bugs from the headlights. Choose gentle cleaners that do not harm the plastic.
- Mild soap mixed with water
- White vinegar diluted with water
- Baking soda paste (baking soda and water)
- Commercial headlight cleaning solutions
Polishing Supplies
Polishing removes scratches and foggy layers on your headlights. Use soft materials and polish designed for plastic.
- Fine grit sandpaper (1000 to 3000 grit)
- Plastic polish or rubbing compound
- Microfiber cloths for buffing
- Soft foam applicator pads
Protective Gear
Protective gear keeps you safe while cleaning and polishing headlights. It also helps avoid skin and eye irritation.
- Rubber gloves to protect your hands
- Safety glasses or goggles
- Mask to avoid breathing dust or fumes
Pre-cleaning Preparation
Cleaning your car headlights starts with good preparation. This step helps ensure a safe and effective cleaning process.
Gathering the right tools and protecting your car are key parts before you begin.
Gathering Supplies
Collect all items needed for cleaning your headlights. This saves time and avoids interruptions during the work.
- Soft microfiber cloths
- Mild soap or automotive cleaner
- Bucket with water
- Masking tape
- Sandpaper (if needed for heavy oxidation)
- Polishing compound
- UV sealant or protectant
Protecting Surrounding Areas
Cover areas near the headlights to avoid damage. Paint and trim can scratch or stain during cleaning.
| Area | Protection Method |
|---|---|
| Car Paint | Apply masking tape around headlights |
| Windshield | Cover with plastic sheet or cloth |
| Trim and Bumpers | Use painter’s tape or protective film |
Safety Precautions
Wear protective gear to avoid injury. Follow safe practices during the cleaning process.
- Wear gloves to protect your skin from chemicals
- Use safety glasses to keep dirt and debris out of your eyes
- Work in a well-ventilated area
- Keep children and pets away from cleaning materials
- Read product labels and follow instructions carefully

Credit: www.whocanfixmycar.com
Step-by-step Cleaning Process
Cleaning your car headlights can improve your night driving safety. Over time, headlights get cloudy and dull from dirt and sun damage.
This guide shows simple steps to clean your headlights. You will need basic tools and some patience to get them clear again.
Washing The Headlights
Start by washing the headlights with soap and water. This removes surface dirt and grime. Use a soft cloth or sponge to avoid scratches.
Rinse the headlights well and dry them with a clean towel. Make sure there is no loose dirt before you start sanding.
Sanding Techniques
Use wet sandpaper to remove the cloudy layer on the headlights. Start with a coarse grit like 800 and move to finer grits like 1500 or 2000.
Keep the surface wet while sanding. Sand in a horizontal or vertical motion for even results. Be gentle to avoid damaging the plastic.
- Wet the sandpaper before use
- Smooth, even strokes
- Use finer grit for finishing
- Keep the headlight wet
Applying Polishing Compound
After sanding, apply a polishing compound to the headlights. This helps remove fine scratches and restores clarity.
Use a clean cloth or applicator pad to rub the polish in small circles. Apply enough pressure but do not overdo it.
- Choose a plastic-safe polish
- Apply in small circular motions
- Cover the entire headlight surface
- Wipe off excess polish gently
Buffing For Shine
Use a soft cloth or a buffing tool to buff the headlights. This step increases the shine and smoothness of the surface.
Buff until the headlights look clear and glossy. Regular buffing can protect your headlights from future damage.
- Use microfiber cloth for best results
- Buff in circular motions
- Check for even shine
- Repeat if needed for clearer headlights
Using Household Alternatives
Cleaning car headlights can be done using items found at home. These methods are simple and cost-effective. They help remove dirt and haze from the lights.
Below are three common household methods that work well to clean headlights.
Toothpaste Method
Toothpaste contains mild abrasives that clean the headlight surface. It removes grime and minor scratches effectively.
- Apply a small amount of toothpaste on a soft cloth.
- Rub the headlight in circular motions for several minutes.
- Rinse with water and dry with a clean cloth.
Baking Soda Paste
Baking soda is a gentle abrasive that cleans headlights without damage. Mix it with water to form a paste before use.
| Ingredient | Amount |
| Baking Soda | 2 tablespoons |
| Water | 1 tablespoon |
| Soft Cloth | 1 piece |
After mixing, apply the paste to the headlight and scrub gently. Rinse and dry afterward.
Vinegar And Water Solution
Vinegar is acidic and helps remove oxidation on headlights. Mix it with water to reduce strength and avoid damage.
Use this solution safely by following these tips:
- Mix equal parts white vinegar and water in a spray bottle.
- Spray the solution on the headlights.
- Wipe with a soft cloth in circular motions.
- Rinse thoroughly with clean water.
- Dry with a microfiber towel.
Sealing And Protection
Keeping your car headlights clear and bright is essential for safe driving. After cleaning, sealing them is crucial to maintain their clarity.
Sealing helps protect the headlights from yellowing and damage caused by UV rays and weather conditions.
Applying Uv Sealant
UV sealant is a protective layer that prevents fading and discoloration. Applying it correctly ensures long-lasting results.
- Clean the headlights thoroughly before applying the sealant.
- Use a microfiber cloth to apply the sealant evenly.
- Allow the sealant to dry completely for maximum protection.
Frequency Of Reapplication
Regular reapplication of UV sealant is important. It ensures continuous protection and clarity of your headlights.
| Condition | Reapplication Frequency |
| Harsh Weather | Every 3 months |
| Moderate Weather | Every 6 months |
| Garage Kept | Once a year |
Maintaining Clear Headlights
Clear headlights are important for safe driving at night. Keeping them clean helps you see better and makes your car look nice.
There are simple ways to make sure your headlights stay bright and clear. Follow these tips to maintain them easily.
Regular Cleaning Tips
Regular cleaning keeps your headlights free from dirt and grime. Use these simple steps to clean them effectively.
- Use a microfiber cloth and mild soap to wipe headlights.
- Rinse with water to remove soap residue.
- Dry with a clean cloth to avoid streaks.
Avoiding Harsh Chemicals
Harsh chemicals can damage the plastic on your headlights. It’s best to avoid them for cleaning purposes.
Consider natural cleaning solutions like vinegar and baking soda.
These are gentle and effective for removing stains.
Parking Strategies
Where you park can affect the clarity of your headlights. Sun and weather can cause them to fade over time.
| Parking Tip | Benefit |
| Park in the shade | Prevents UV damage |
| Use a car cover | Protects from rain and dirt |
| Garage parking | Shields from all weather |
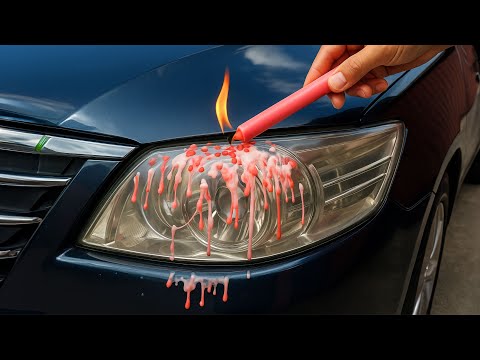
Credit: www.youtube.com
When To Replace Headlights
Car headlights can get dirty or damaged over time. It is important to know when to replace them. Clear headlights help you see better at night and keep you safe.
Sometimes cleaning is enough, but other times you need new headlights. Look for signs that show your headlights need replacing.
Signs Of Severe Damage
Check your headlights for cracks, deep scratches, or yellowing. These signs mean your headlights are not working well. Moisture inside the headlight is another bad sign. It can cause fog and reduce light.
- Cracks or broken lens
- Yellow or cloudy surface
- Moisture inside the headlight
- Flickering or dim light
- Visible damage to the bulb
Cost Vs. Repair Considerations
Replacing headlights can cost more than cleaning or simple repairs. Think about the cost and how long the repair will last. Sometimes a quick fix works, but often a new headlight is better.
| Option | Cost | Durability |
| Cleaning and Polishing | Low | Short-term |
| Replacing Bulbs | Moderate | Medium-term |
| Replacing Headlight Assembly | High | Long-term |
Frequently Asked Questions
How Do I Clean Cloudy Car Headlights At Home?
To clean cloudy headlights, use a mixture of baking soda and water. Apply it with a cloth and scrub gently. Rinse with water and dry. This method removes oxidation and restores clarity without harsh chemicals.
What Household Items Can Clean Car Headlights Effectively?
Common items like toothpaste, baking soda, and vinegar work well. Toothpaste acts as a mild abrasive to remove grime. Baking soda and vinegar help dissolve dirt and oxidation, making headlights clear and bright again.
How Often Should I Clean My Car Headlights?
Clean headlights every 3 to 6 months to maintain brightness. Regular cleaning prevents buildup of dirt and oxidation. This improves night visibility and overall driving safety.
Can I Use Car Wax On Headlights After Cleaning?
Yes, applying car wax after cleaning protects headlights. It creates a barrier against dirt, water, and UV rays. Waxing prolongs the clarity and reduces frequent cleaning needs.
Conclusion
Clean headlights improve your safety and car appearance. Regular cleaning keeps light bright and clear. Use simple household items for easy cleaning. Avoid harsh chemicals that may damage plastic covers. Clean headlights often to prevent fog and dirt buildup. Clear lights help you see better at night.
Take small steps today for a safer drive tomorrow. Your car will look fresh and well cared for. Simple care makes a big difference on the road.


