
Have you ever thought about tinting your car windows yourself but didn’t know where to start? Imagine saving money and giving your car a sleek new look all in one afternoon.
DIY car window tinting is easier than you think, and it puts you in control of the whole process. In this guide, you’ll discover simple steps, expert tips, and common mistakes to avoid—so your windows look flawless every time. Ready to transform your ride and enjoy cooler, more private drives?
Keep reading to unlock the secrets of perfect DIY car window tinting.
Benefits Of Car Window Tint
Car window tint offers many advantages for drivers and passengers. It can improve comfort and safety inside your vehicle.
Applying tint to your car windows is a simple way to enhance your driving experience in different ways.
Enhancing Privacy And Security
Window tint helps keep your vehicle’s interior private. It makes it harder for others to see inside your car.
This added privacy protects your belongings and reduces the risk of theft. It also gives you a sense of security.
Reducing Heat And Glare
Tinted windows block sunlight and reduce heat inside your car. This keeps the cabin cooler on hot days.
It also lowers glare from the sun, making it easier to see while driving and reducing eye strain.
- Blocks up to 60% of solar heat
- Reduces glare for safer driving
- Keeps car interior temperature comfortable
Protecting Interior From Uv Damage
Window tint blocks harmful UV rays from the sun. These rays can fade and damage your car’s interior materials.
By reducing UV exposure, tint helps your seats, dashboard, and panels stay in good condition longer.
- Prevents fading of upholstery
- Protects dashboard from cracking
- Extends life of interior surfaces
Boosting Vehicle Appearance
Car window tint gives your vehicle a sleek, polished look. It adds style and can make your car stand out.
Many people choose tint to improve their car’s overall appearance and create a uniform look.

Credit: www.youtube.com
Types Of Window Tint Films
Car window tint films come in different types. Each type has unique features and benefits. Choosing the right film depends on your needs and budget.
Below, we explain four common types of window tint films. This will help you understand what each one offers.
Dyed Window Films
Dyed films use a layer of dye to absorb sunlight. They reduce glare and block some heat. These films are usually the most affordable option.
They also help protect your car’s interior from fading. Dyed films do not block as much heat as other types.
Metalized Films
Metalized films have tiny metal particles inside. These particles reflect heat and UV rays. Metalized films make the glass stronger and more shatter-resistant.
- Blocks a good amount of heat
- Improves safety by strengthening glass
- May cause signal interference with devices
- Has a shiny look on the windows
Carbon Films
Carbon films use carbon particles for tinting. They do not contain metal, so no signal interference occurs. These films block heat well and provide a matte finish.
Carbon films keep the color stable over time. They do not fade like dyed films. This makes them a popular choice for lasting appearance.
Ceramic Films
| Feature | Description |
|---|---|
| Heat Rejection | Blocks up to 50% more heat than other films |
| UV Protection | Blocks up to 99% of UV rays |
| Signal Interference | No interference with phones or GPS |
| Appearance | Clear or slightly tinted, non-reflective |
| Cost | More expensive than other films |
Ceramic films offer the best performance but cost more. They help keep your car cool and protect your skin and interior.
Tools And Materials Needed
Installing car window tint yourself can save money. You need the right tools and materials for a good job.
Using the correct items helps avoid mistakes and makes the work easier. Let’s look at what you need.
Essential Tools List
You need some simple tools to install tint on your car windows. These tools help cut, smooth, and fit the film.
- Utility knife or razor blade
- Spray bottle with soapy water
- Squeegee or plastic card
- Measuring tape or ruler
- Lint-free cloth or microfiber towel
- Heat gun or hair dryer
- Gloves to avoid fingerprints
Choosing The Right Tint Film
Pick the right tint film for your needs and local laws. Some films block heat, and others block UV rays.
Look for films with good quality and a warranty. Make sure the film size fits your car windows.
- Dyed film: affordable and reduces glare
- Metalized film: blocks heat and UV rays well
- Carbon film: blocks heat without metal
- Ceramic film: best heat and UV protection
- Check local tint darkness laws before buying
Cleaning Supplies
Cleaning your windows well is important for tint to stick properly. Dirt or dust can cause bubbles.
Use the right cleaning supplies to avoid scratches and residue on the glass.
- Glass cleaner or rubbing alcohol
- Microfiber cloths for wiping
- Plastic razor blade scraper for tough dirt
- Spray bottle with clean water
Credit: www.etsy.com
Preparing Your Car For Tinting
Preparing your car properly helps the tint last longer. It also makes the tinting process easier and neater. Clean and clear windows are important before starting.
Take time to remove any old tint and work in a clean space. These steps help you get the best results with your DIY car window tint.
Cleaning The Windows Thoroughly
Clean windows help the tint stick well. Use a glass cleaner and a lint-free cloth. Remove dirt, dust, and grease from every window surface.
- Spray glass cleaner on the window
- Wipe using a microfiber cloth in circular motions
- Check for leftover spots or streaks
- Repeat if needed for a clear finish
Removing Old Tint Film
Old tint film must be removed before adding a new layer. Heat the window to soften the glue. Use a razor blade to peel off the old film carefully.
| Tool | Purpose |
| Heat gun or hair dryer | Softens adhesive under old tint |
| Razor blade or scraper | Helps peel off old tint film |
| Glass cleaner | Removes leftover adhesive and dirt |
Ensuring A Dust-free Environment
A clean work area stops dust from trapping under the tint. Work inside a garage or closed space. Turn off fans and air conditioning to avoid air movement.
- Clean the floor and surfaces before starting
- Use a damp cloth to wipe down nearby objects
- Close windows and doors to limit outside dust
- Wear clean clothes to avoid bringing in dirt
Step-by-step Tinting Process
Tinting your car windows yourself can save money and give you control. The process needs care and patience for good results.
This guide explains each step clearly. Follow these steps to tint your car windows properly.
Measuring And Cutting The Film
First, measure the size of your car window accurately. Use a tape measure to get the height and width.
Cut the tint film slightly larger than the window size. This extra film helps during application.
- Measure window height and width
- Add about 1 inch to each side
- Cut film with a sharp blade or scissors
Applying Soapy Water Solution
Mix water with a few drops of liquid soap in a spray bottle. This solution helps slide the film on the glass.
Spray the solution evenly on the inside of the car window. Make sure the surface is fully wet before placing the film.
- Use clean water
- Add 2-3 drops of liquid soap
- Spray enough to cover the window
Positioning The Film On The Window
Peel the backing from the tint film carefully. Avoid touching the sticky side with your fingers.
Place the film on the wet window. Start from the top and let it hang down slowly. Adjust the film to fit the window shape.
- Handle film edges gently
- Align film with window edges
- Keep film wet to move easily
Smoothing Out Bubbles And Wrinkles
Use a plastic squeegee to press the film against the glass. Push water and air bubbles out toward the edges.
Work slowly and gently to avoid tearing the film. Smooth wrinkles by lifting and repositioning if needed.
- Start from the center
- Push bubbles outward
- Check for wrinkles and fix them
Trimming Excess Film
After smoothing, trim the extra film around the window edges. Use a sharp utility knife for clean cuts.
Be careful not to cut the car window seals or rubber trims. Trim slowly for the best fit.
- Use a sharp blade
- Cut along window edges
- Avoid damaging seals
Drying And Curing Time
Let the tint dry naturally. Avoid rolling down windows or touching the film for at least 24 hours.
The film fully cures in about a week. During this time, keep the windows clean and avoid moisture.
- Do not open windows for 24 hours
- Keep the car in shade if possible
- Wait one week for full curing

Credit: www.amazon.com
Common Mistakes To Avoid
Tinting your car windows can be a rewarding DIY project. It offers privacy and sun protection. Yet, many make common mistakes that lead to poor results.
Here, we look at some typical errors and how to avoid them. This will ensure your tinting job is smooth and professional-looking.
Using Dirty Tools Or Surfaces
Clean tools and surfaces are essential for window tinting. Dirt can cause bubbles and creases in the film.
- Wash and dry your car windows thoroughly.
- Use clean, lint-free cloths for application.
- Ensure tools are free from dust and debris.
Incorrect Film Size Or Placement
Fitting the film correctly is crucial for a neat finish. Wrong sizes lead to gaps or overlaps.
| Problem | Solution |
| Film too large | Trim to fit each window |
| Film too small | Re-measure before cutting |
| Misalignment | Align carefully before applying |
Rushing The Application Process
Take your time to apply the tint smoothly. Hasty work often results in bubbles and creases.
- Peel the film slowly and evenly.
- Use a squeegee to remove air bubbles.
- Apply firm, even pressure throughout.
Ignoring Local Tinting Laws
Every region has its own rules about window tinting. Ignoring these can lead to fines or the need to remove the tint.
- Check the legal tint percentage in your area.
- Ensure compliance before applying the film.
- Consult local regulations for special conditions.
Maintaining Tinted Windows
Proper maintenance ensures your car’s tinted windows last longer. Learn how to care for them effectively.
Follow these tips to keep your car window tint in great condition and avoid unnecessary replacements.
Cleaning Tips For Longevity
Cleaning your tinted windows the right way prevents scratches and damage. Use a soft cloth and mild cleaner.
- Use a microfiber cloth to avoid scratches
- Mix water and a few drops of dish soap
- Avoid ammonia-based cleaners
Avoiding Damage And Peeling
Damage and peeling can happen if tint is exposed to harsh conditions. Protect them by parking in the shade.
When To Replace Tint Film
Replacement is needed when tint shows signs of wear. Look for bubbles, fading, or peeling.
| Sign | Action |
| Bubbles | Consider professional inspection |
| Fading | Plan for replacement |
| Peeling | Replace immediately |
Legal Considerations For Window Tinting
Car window tinting can improve comfort and privacy. Knowing the laws helps you avoid fines.
Each area has rules on how dark or reflective your tint can be. Follow these rules to stay legal.
Understanding Local Regulations
Every state or region sets its own rules about window tinting. These laws control how much light must pass through your car windows.
- Check state or city websites for tint laws.
- Some places allow darker tint on rear windows only.
- Medical exemptions may apply for some drivers.
- Rules often differ for cars and trucks.
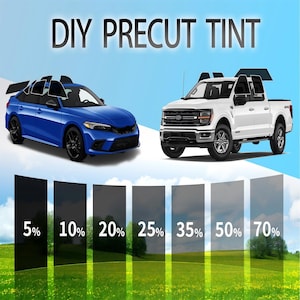
Permissible Tint Darkness Levels
Tint darkness is measured by Visible Light Transmission (VLT). VLT shows how much light passes through the tint.
| Window Type | Minimum VLT (%) | Notes |
| Front Side Windows | 70 | Most states require lighter tint here. |
| Rear Side Windows | Any | Darker tint often allowed. |
| Rear Window | Any | Many states permit dark or reflective tint. |
Penalties For Non-compliance
Breaking tint laws can lead to fines or warnings. Police may ask you to remove illegal tint.
- Fines usually range from $50 to $200.
- Repeated offenses may cost more.
- Some states may fail your vehicle inspection.
- Illegal tint may cause problems with insurance claims.
Frequently Asked Questions
What Tools Do I Need For Diy Car Window Tinting?
You need window tint film, a squeegee, a utility knife, spray bottle with soapy water, and a heat gun for precise application. These tools ensure smooth, bubble-free tint installation.
How Long Does Diy Car Window Tinting Take?
DIY tinting typically takes 1 to 3 hours depending on your skill and window size. Patience is key to avoid mistakes and achieve a professional look.
Can I Remove Diy Window Tint If Needed?
Yes, tint film can be removed using heat and adhesive remover. Careful removal prevents window damage and allows for reapplication or replacement.
Is Diy Window Tinting Legal In All States?
Window tint laws vary by state and window type. Always check local regulations to ensure your tint complies with legal limits.
Conclusion
DIY car window tint can save money and add style to your vehicle. It helps reduce heat and protects your car’s interior from sun damage. Take your time and follow the steps carefully for the best results. Use good quality tint film and tools for a smooth finish.
Remember, patience is key to avoid bubbles and wrinkles. Enjoy the comfort and privacy a tinted car window brings. This simple project gives you control and satisfaction. Try it yourself and see the difference it makes.


