
Looking to add extra space for your gear? Attaching a roof rack to your car is the perfect solution.
But if you’ve never done it before, it might feel a bit tricky. You want it secure, safe, and easy to use every time. In this guide, you’ll discover simple steps to install your roof rack without stress. By the end, you’ll have the confidence to carry your bikes, luggage, or sports equipment wherever you go.
Ready to make your car more versatile? Let’s get started!
Choosing The Right Roof Rack
Attaching a roof rack to your car lets you carry extra gear safely. Choosing the right roof rack is important for safety and convenience.
This guide covers types of roof racks, how to check if they fit your car, and weight limits to consider.
Types Of Roof Racks
Roof racks come in several types. Each type suits different needs and vehicle styles.
- Raised Side Rails: These rails are fixed and run along the roof edges.
- Flush Side Rails: These sit flat and close to the roof.
- Fixed Point Systems: Use factory-made mounting points on the car roof.
- Roof Rails with Crossbars: Crossbars connect side rails to hold cargo.
- Aftermarket Roof Racks: Custom racks that fit most cars but need proper installation.
Compatibility With Your Car
Not all roof racks fit every car. Check your car’s roof type and mounting points before buying.
| Car Roof Type | Compatible Roof Rack |
| Raised Side Rails | Fits raised side rail racks |
| Flush Side Rails | Works with flush rail racks |
| No Rails, Fixed Points | Use fixed point system racks |
| No Rails, No Points | Requires clamps or adhesive racks |
Weight Capacity Considerations
Each roof rack has a maximum weight limit. Overloading can cause damage or accidents.
Follow these tips for weight limits:
- Check your car’s owner manual for roof load limits.
- Consider the rack’s maximum weight capacity.
- Include the weight of the rack itself in calculations.
- Distribute weight evenly on the rack to avoid imbalance.
Preparing Your Vehicle
Before attaching a roof rack, you must get your vehicle ready. Proper preparation helps secure the rack safely.
Check the roof and mounting areas carefully. This prevents damage and ensures a strong fit.
Cleaning The Roof Surface
Clean the roof surface where the rack will sit. Dirt and debris can stop the rack from attaching properly.
Use a mild soap and water to wash the area. Dry it well to avoid slipping during installation.
- Remove leaves, dust, and bird droppings
- Wipe with a soft cloth or sponge
- Dry the surface completely before fitting
Checking Roof Rails Or Mounting Points
Look for roof rails or fixed mounting points on your car. These are the spots where you attach the rack.
Make sure rails or mounts are secure and free from rust or damage. Weak points can cause the rack to fail.
- Inspect rails for cracks or loose parts
- Check mounting points for corrosion
- Tighten any loose screws or bolts
Gathering Necessary Tools
Attaching a roof rack to your car needs the right tools. Using proper tools makes the job easier and safer.
Before starting, gather all tools you need. This helps avoid delays and keeps the work smooth.
Essential Tools List
Some basic tools are needed to attach a roof rack. Having them ready saves time and effort.
- Socket wrench set for tightening bolts
- Screwdriver set, both flathead and Phillips
- Measuring tape to check rack alignment
- Rubber mallet for gentle adjustments
- Allen keys for hex screws
- Torque wrench to apply correct tightness
- Cleaning cloth to wipe surfaces before fitting
Safety Gear Recommendations
Using safety gear protects you during the installation. It helps prevent injuries and keeps you comfortable.
Always wear proper safety items before you start working on your roof rack.
- Protective gloves to avoid cuts and scrapes
- Safety glasses to shield eyes from dust
- Non-slip shoes for stable footing
- Long sleeves to protect arms from scratches
- Step stool or ladder for safe reach
Step-by-step Installation
Attaching a roof rack to your car helps you carry extra cargo safely. This guide shows you how to install the roof rack in clear steps.
Follow these instructions carefully to ensure your roof rack is secure and stable during use.
Positioning The Roof Rack
Place the roof rack on the car roof where it fits best. Make sure it is centered and aligned with the car’s frame.
- Clean the roof surface to remove dirt.
- Set the roof rack bars evenly apart.
- Check that the rack does not block windows.
- Ensure the rack is parallel to the car sides.
Securing Mounting Brackets
Attach the mounting brackets to the roof rack and car roof to hold the rack firmly. Use the parts that came with your roof rack kit.
| Bracket Part | Location on Car | Purpose |
|---|---|---|
| Front Bracket | Near windshield edge | Secures front of rack |
| Rear Bracket | Near rear window | Secures back of rack |
| Side Clamps | Roof sides | Hold rack bars steady |
Tightening Bolts And Screws
Use a wrench or screwdriver to tighten all bolts and screws on the roof rack. Make sure each is secure but avoid over-tightening.
- Start with hand-tightening bolts.
- Use tools to tighten bolts firmly.
- Check bolts on both sides evenly.
- Test the rack for any movement.
Final Adjustments
Check the roof rack once more for stability. Adjust the brackets or bolts if you find any loose parts.
Ensure the rack is level and does not interfere with doors or windows. Test it by applying light pressure to confirm it holds steady.
Testing Stability And Safety
Attaching a roof rack to your car requires careful testing. You must ensure it stays secure during travel.
Checking the rack’s stability helps prevent accidents and protects your cargo. Safety is the top priority.
Checking For Movement
After installation, test the roof rack for any movement. Push and pull on different parts to feel for looseness.
- Try to wiggle the rack side to side.
- Push down firmly on each corner.
- Check the clamps and bolts for tightness.
- Look for gaps between the rack and car roof.
- Listen for unusual noises during movement.
Load Testing Tips
Load the rack gradually to test its strength. Avoid placing full weight immediately.
| Test Load | Action | Expected Result |
| Light Load (up to 25% max) | Drive slowly on flat road | No movement or noise |
| Medium Load (50% max) | Drive on uneven surface | Rack remains secure |
| Full Load (max capacity) | Drive at highway speed | No looseness or shifting |
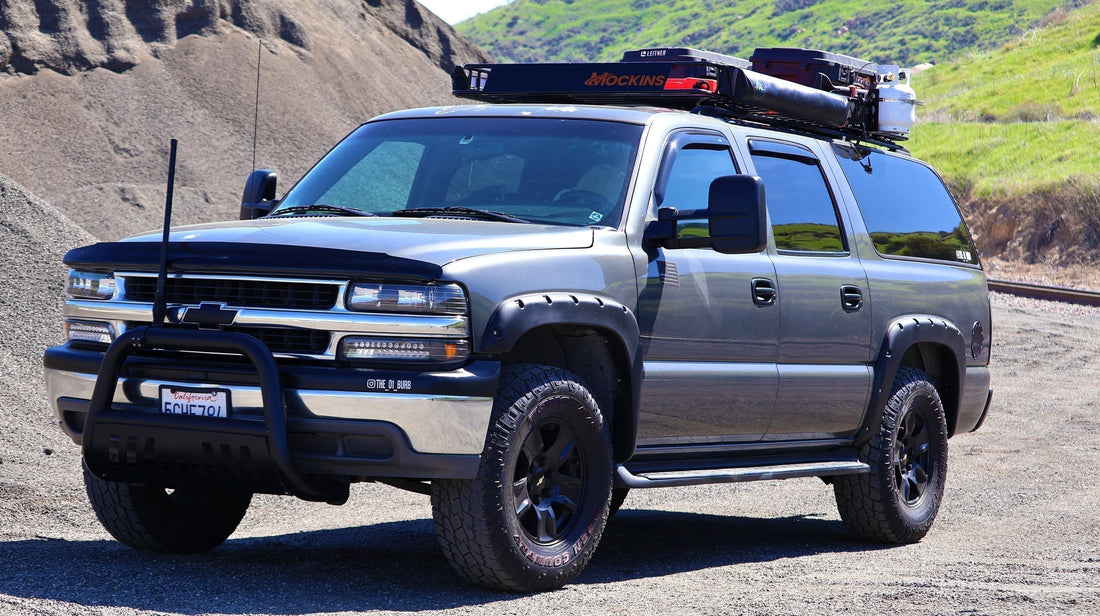
Credit: mockins.com
Maintenance Tips For Roof Racks
Roof racks are great for carrying extra luggage. They need regular care to last long.
Proper maintenance helps prevent damage. Follow these tips to keep your roof rack in good shape.
Regular Inspection
Check your roof rack often. Look for loose bolts or rust. Tighten any loose parts.
Inspect the rack for cracks or bends. Replace broken parts to ensure safety.
- Examine bolts and screws
- Check for rust or corrosion
- Look for cracks or bends
Cleaning And Lubrication
Clean your roof rack regularly. Use mild soap and water. Dry it thoroughly to prevent rust.
Lubricate moving parts. Use silicone spray for smooth operation. Avoid using harsh chemicals.
- Wash with mild soap
- Dry completely after washing
- Lubricate with silicone spray
Common Installation Mistakes
Attaching a roof rack to your car can be tricky. Mistakes can affect safety and functionality.
Understanding common errors helps avoid issues during installation. Let’s explore these mistakes.
Avoiding Over-tightening
Over-tightening can damage your car or rack. It can also make removal difficult.
- Use a torque wrench for accurate tightening
- Follow the manufacturer’s guidelines
- Inspect for stress marks on the roof
Ensuring Proper Alignment
Proper alignment is crucial for stability. Misalignment can cause noise and increase drag.
| Alignment Step | Action |
| Check Measurements | Ensure distances are equal on both sides |
| Adjust Position | Align with car roof markings |
| Secure Rack | Tighten bolts equally |

Credit: www.dropracks.com

Credit: www.youtube.com
Frequently Asked Questions
How Do I Attach A Roof Rack To My Car Safely?
To attach a roof rack safely, first check the car’s roof type. Use compatible mounting brackets. Tighten all bolts securely. Follow the manufacturer’s instructions carefully. Ensure the rack is stable before loading any items.
What Tools Are Needed To Install A Roof Rack?
Common tools include a wrench, screwdriver, and measuring tape. Some roof racks require special keys or Allen wrenches. Always have these ready to ensure a smooth installation process. Check the rack manual for specific tool requirements.
Can I Install A Roof Rack Without Professional Help?
Yes, many roof racks are designed for DIY installation. Follow step-by-step instructions provided by the manufacturer. Take your time to avoid mistakes. If unsure, watch tutorial videos or seek advice from experts.
Will A Roof Rack Affect My Car’s Fuel Efficiency?
Yes, a roof rack can reduce fuel efficiency. It increases air resistance and drag. Remove the rack when not in use to save fuel. Securely attaching the rack also minimizes wind noise.
Conclusion
Attaching a roof rack to your car is simple and useful. It helps carry extra gear safely and frees up inside space. Always check the instructions for your specific rack type. Secure all parts tightly before driving. Regularly inspect the rack to keep it safe and steady.
With the right steps, your roof rack will last long and work well. Enjoy the extra space for trips and adventures. Safe travels!


