
Looking to carry extra gear without cramming your car’s interior? Attaching a roof rack to your car is the perfect solution.
But if you’re unsure how to do it right, you might worry about safety, damage, or wasted time. Don’t let that stop you. This guide will walk you through simple, step-by-step instructions to securely attach a roof rack. By the end, you’ll feel confident knowing your gear is safe and your car is ready for any adventure.
Keep reading—your next trip just got a whole lot easier.
Choose The Right Roof Rack
Attaching a roof rack to your car can increase its carrying capacity. It helps you transport gear like bikes, luggage, or kayaks.
Choosing the right roof rack is important for safety and convenience. Consider your needs and your car’s features before buying.
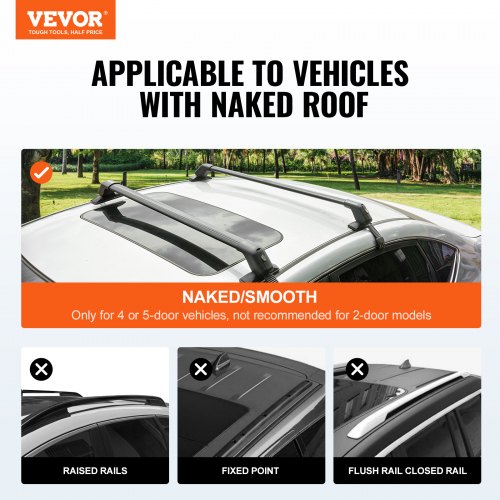
Types Of Roof Racks
There are several types of roof racks. Each type works best for different uses and cars.
- Raised Rail Racks: Attach to raised rails on your car roof.
- Flush Rail Racks: Fit cars with rails that sit flush to the roof.
- Fixed Point Racks: Use specific mounting points built into the car.
- Track Systems: Have tracks where you can slide the rack to adjust.
- Clamping Racks: Clamp onto the door frame or window edge.
Compatibility With Your Car
Not all roof racks fit every car. Check your car’s roof type before buying.
Look for racks designed for your car model or roof style. This ensures a secure fit and avoids damage.
- Check if your car has roof rails or fixed mounting points.
- Measure your roof width and shape.
- Confirm the rack’s fit by reading product details.
Weight Capacity Considerations
Every roof rack has a weight limit. It is important not to exceed this limit for safety.
Your car’s roof can also hold only a certain amount of weight. Check your car manual for this info.
- Know the maximum weight of the roof rack.
- Check your car roof’s maximum load capacity.
- Do not overload with heavy items.
- Distribute weight evenly on the rack.
Gather Necessary Tools
To attach a roof rack to your car, you need the right tools. Getting these tools ready saves time and avoids mistakes.
Gathering all items before you start helps the job go smoothly. It also keeps you safe while working.
Common Tools Needed
- Socket wrench set
- Measuring tape
- Rubber mallet
- Phillips and flathead screwdrivers
- Torque wrench
- Allen keys
- Cleaning cloth
These tools help you fit the roof rack tightly and correctly. A torque wrench ensures bolts have the right pressure.
Safety Gear Recommendations
| Safety Gear | Purpose |
|---|---|
| Work gloves | Protect hands from cuts and scrapes |
| Safety glasses | Shield eyes from dust and debris |
| Non-slip shoes | Provide stable footing on wet or slippery surfaces |
| Long sleeves | Prevent skin scratches during installation |
Wearing safety gear reduces injury risk. Always check your gear before starting the job.
Prepare Your Car Roof
Attaching a roof rack needs a clean and safe surface. Preparing your car roof helps the rack fit well and last longer.
Start by checking your roof carefully. This ensures no damage will get worse or cause problems later.
Clean The Surface
Remove dirt, dust, and grease from the roof. Use soap and water or a gentle cleaner for best results.
Dry the surface fully before attaching the roof rack. A clean surface helps the rack stick and stay strong.
- Use a soft cloth to avoid scratches
- Clean all areas where the rack will touch
- Make sure no soap residue remains
Inspect For Damage
Look for dents, cracks, or rust on the roof. These can weaken the area where the rack will attach.
Fix any damage before installing the roof rack. This keeps your car safe and protects the roof rack.
- Check the paint for chips or peeling
- Look under rubber seals for water damage
- Test for loose parts or weak spots

Credit: www.dropracks.com
Position The Roof Rack
Positioning the roof rack correctly on your car is important for safety and function. It helps carry loads evenly and avoids damage.
Take your time to place the rack in the right spot before tightening the mounts. This ensures a secure fit and good balance.
Aligning With Roof Rails
Start by aligning the roof rack with the car’s roof rails. These rails guide where the rack should sit.
Make sure the rack bars are straight and parallel to the rails. This keeps the rack stable while driving.
- Place the rack bars over the roof rails
- Check that each bar lines up evenly on both sides
- Adjust the bars to avoid gaps or overlaps
Checking Rack Placement
After aligning, check the rack’s placement on the roof. It should be centered and not block any doors or windows.
Also, confirm the rack sits evenly on both sides. Uneven placement can cause noise and reduce safety.
- Center the rack between the front and rear roof edges
- Ensure the rack does not interfere with door opening
- Verify all mounting points touch the roof rails firmly
Secure The Roof Rack
Securing the roof rack properly keeps your gear safe during travel. You must check all parts to avoid accidents.
Focus on tightening bolts and clamps. Use locking mechanisms to stop thieves and keep the rack steady.
Tightening Bolts And Clamps
Tighten all bolts firmly using the right tools. Loose bolts can cause the rack to move or fall off.
Check clamps around the car roof. Make sure they grip the surface tightly without damaging the paint.
- Use a wrench or socket set to tighten bolts
- Do not overtighten to avoid stripping threads
- Inspect clamps for cracks or wear before use
- Adjust clamps to fit your car roof shape
Using Locking Mechanisms
Locking mechanisms add extra security to your roof rack. They prevent theft and keep parts from loosening.
Use keys or combination locks designed for your rack. Always lock after installation and before driving.
- Choose locks that fit your roof rack model
- Keep keys in a safe, accessible place
- Test locks before every trip
- Replace worn or damaged locks immediately
Test Stability And Fit
Attaching a roof rack to your car is not enough. You need to test its stability and fit. Ensuring the rack is secure will keep your cargo safe on the road.
This process involves checking how well the rack holds, especially during movement. You want to avoid any loose parts that could lead to accidents.
Shaking And Adjusting
Once the roof rack is in place, shake it gently. This helps you check if it’s firm. If it moves too much, adjustments are necessary.
Tighten any loose bolts to improve the fit. Make sure each part is aligned correctly. Proper alignment keeps the rack stable while driving.
- Check each bolt for tightness
- Ensure the rack sits flat on the roof
- Look for any gaps between the rack and car
Load Testing Tips
Before loading your gear, do a test with some weight. This shows how the rack handles pressure. Start with light items and gradually increase the weight.
Observe how the car and rack react to the added load. If everything remains steady, you’re ready for your journey. If not, adjustments are needed.
| Load Type | Recommended Action |
| Light items | Check for small shifts |
| Medium weight | Ensure no sagging |
| Heavy load | Look for stability issues |
Maintain Your Roof Rack
Maintaining your roof rack is important for safety and durability. A well-maintained roof rack performs better and lasts longer.
Regular care ensures your roof rack stays in top condition. Here are some tips for keeping it well-maintained.
Regular Inspections
Check your roof rack before each use. Look for any signs of damage or wear.
Ensure all parts are secure and tight. Pay attention to bolts and screws.
- Inspect for rust or corrosion
- Examine the mounting points
- Test the locks and clamps
Cleaning And Storage
Keep your roof rack clean to prevent dirt build-up. Clean it after trips, especially if driving through mud or salt.
Store your roof rack properly when not in use. This prevents unnecessary wear and tear.
- Use mild soap and water for cleaning
- Dry thoroughly to avoid rust
- Store in a cool, dry place

Credit: www.reddit.com
Credit: www.vevor.ca
Frequently Asked Questions
How Do I Attach A Roof Rack To My Car?
To attach a roof rack, first identify your car’s roof type. Align the rack’s mounting points with your car’s roof rails or door frames. Secure the rack using provided clamps or bolts. Always check the rack’s stability before use for safety.
What Tools Are Needed To Install A Roof Rack?
You typically need a wrench, screwdriver, and possibly an Allen key. Some roof racks come with all necessary tools. Having a tape measure helps ensure proper alignment. Always consult the rack’s manual for specific tool requirements.
Can I Install A Roof Rack Without Roof Rails?
Yes, some roof racks are designed for cars without roof rails. These use clamps that attach to the door frame edges. Ensure the rack model supports your car type. Proper installation is crucial to avoid damage or accidents.
How Much Weight Can A Car Roof Rack Hold?
Roof racks usually support between 75 to 150 pounds. Always check your car’s manual for maximum load limits. Overloading can damage the roof or affect vehicle handling. Distribute weight evenly for safe driving.
Conclusion
Attaching a roof rack to your car is simple and useful. It helps carry extra items safely on trips. Follow the steps carefully to avoid damage or accidents. Check all parts fit tightly before driving. Regularly inspect the rack to keep it secure.
Enjoy more space for luggage, bikes, or gear. A well-installed roof rack makes travel easier and stress-free. Take your time and stay safe on the road.


