
Are your car’s headlights looking dull or cloudy? This can make driving at night harder and even unsafe.
But don’t worry—you can fix this yourself with just a few simple steps. Cleaning your headlights not only improves how your car looks but also boosts your visibility on the road. In this guide, you’ll learn easy and effective ways to restore your headlights to their clear, bright best.
Ready to see the difference and drive safer? Let’s get started!
Credit: www.youtube.com
Why Headlight Cleaning Matters
Clean headlights improve your car’s lighting and look. Dirt and grime build up over time. This reduces the light your headlights give off.
Regular cleaning helps keep your headlights clear. This makes driving safer and your car more attractive.
Impact On Night Driving
Dirty headlights make it harder to see at night. The light becomes dim and blurry. This can cause eye strain and slower reaction times.
- Reduced visibility on dark roads
- Difficulty spotting obstacles or signs
- Increased risk of accidents
- More strain on your eyes while driving
Effects On Car Appearance
Headlights covered with dirt or yellowing look old and worn. This lowers the overall look of your car. Clean headlights give your car a fresh and cared-for appearance.
| Condition | Appearance |
| Clean and clear | Bright and fresh look |
| Dirty or foggy | Dull and aged look |
| Yellowed or cracked | Old and neglected look |
Safety Concerns
Clear headlights are important for your safety. They help other drivers see you. Dirty headlights reduce how well you can see and be seen.
Key safety points to remember:
- Bright headlights improve your reaction time.
- Visible headlights prevent collisions.
- Proper lighting helps in bad weather.
- Regular cleaning keeps headlights working well.
Credit: www.youtube.com
Common Causes Of Headlight Cloudiness
Headlights can become cloudy over time, making it hard to see at night. This cloudiness affects your safety and the look of your car.
Several reasons cause headlights to lose their clear shine. Knowing these reasons helps you clean and protect them better.
Uv Damage
Sunlight has ultraviolet (UV) rays that harm headlight lenses. These rays break down the plastic surface.
Over time, UV damage causes the headlights to turn yellow and cloudy. This makes the light weaker and less clear.
Dirt And Grime Buildup
Road dirt, dust, and grime stick to headlights every day. This layer covers the lens and reduces light brightness.
Without regular cleaning, dirt builds up and makes the headlights look dull and foggy.
- Dust from roads
- Bug splashes
- Tree sap and pollen
- Water spots from rain
Oxidation Process
Oxidation happens when oxygen reacts with the headlight’s plastic surface. This reaction creates a cloudy layer.
The oxidation process makes headlights look hazy and weak. It often happens after long exposure to air and sunlight.
Tools And Materials Needed
Cleaning your car’s headlights requires some simple tools and materials. You can find many of these items at home or buy them easily. Using the right gear helps get the best results and keeps you safe.
This guide covers household items, commercial cleaners, and protective gear you need for cleaning headlights.
Household Items
You can use common household products to clean headlights effectively. These items help remove dirt and grime without harsh chemicals.
- Dish soap for basic cleaning
- Baking soda as a mild abrasive
- White vinegar to break down buildup
- Toothpaste with baking soda for polishing
- Soft microfiber cloths to avoid scratches
- Masking tape to protect paint around headlights
Commercial Cleaners
Special products can make headlight cleaning easier and more effective. These cleaners are made for plastic and glass surfaces.
| Product | Purpose | Notes |
|---|---|---|
| Headlight restoration kits | Clean and polish headlights | Includes sandpaper and polish |
| Plastic polish | Remove scratches and haze | Use with soft cloths |
| UV sealant spray | Protect headlights from sun damage | Apply after cleaning |
| Glass cleaner | Final cleaning for clear finish | Avoid ammonia-based types |
Protective Gear
Wear protective gear to keep yourself safe from chemicals and dust during cleaning.
- Rubber gloves to protect your hands
- Safety goggles to shield your eyes
- Dust mask to avoid inhaling particles
- Old clothes or apron to protect your skin

Credit: www.msn.com
Step-by-step Cleaning Methods
Cleaning headlights improves car safety and looks. Dirt and grime make lights dim and hard to see.
Try simple cleaning methods at home. These steps help clear cloudy or yellowed headlights.
Using Toothpaste
Toothpaste can clean headlights because it acts like a mild abrasive. It removes dirt and light scratches.
Apply toothpaste on a soft cloth. Rub the headlight in small circles for a few minutes.
- Clean the headlight with soap and water first
- Put toothpaste on the cloth
- Rub the headlight in circular motions
- Rinse with water and dry with a clean cloth
Baking Soda And Vinegar Technique
Baking soda and vinegar work well to clean headlights. They help remove grime and stains.
Mix baking soda and vinegar into a paste. Apply it to the headlight and scrub gently.
- Mix 2 parts baking soda with 1 part vinegar
- Spread the paste on the headlight surface
- Use a soft brush or cloth to scrub the light
- Rinse thoroughly with water and dry
Sandpaper And Polish Approach
This approach removes tough oxidation and scratches. Sandpaper smooths the headlight surface.
Start with fine-grit sandpaper and wet sand the headlight. Then apply polish to restore shine.
- Use 1000 to 3000 grit wet sandpaper
- Keep the surface wet while sanding
- Sand evenly in horizontal and vertical strokes
- Rinse and dry the headlight
- Apply polish with a microfiber cloth
- Buff until the headlight shines clearly
Applying Headlight Restoration Kits
Restoration kits include all tools needed for cleaning headlights. They often have polish and sanding pads.
Follow the instructions in the kit carefully. Kits provide easy steps to restore clarity.
- Clean the headlights before starting
- Use sanding pads provided to remove oxidation
- Apply polish or sealant as directed
- Let the sealant dry fully
- Repeat if needed for better results
Tips For Maintaining Clear Headlights
Clear headlights help you see better at night. They also make your car look newer. Dirt and sun can make headlights cloudy over time.
Keeping headlights clean is easy with the right habits. Use simple tips to keep them clear and bright.
Regular Cleaning Schedule
Clean your headlights often to stop dirt buildup. Use car soap and water for gentle cleaning. Avoid harsh chemicals that can damage plastic.
Wipe headlights with a soft cloth after washing. This helps remove dust and bugs that stick to the surface.
- Wash headlights every two weeks
- Use mild soap and water
- Dry with a soft microfiber cloth
- Check for cracks or damage
Uv Protection Coatings
Sunlight can fade and yellow headlights. UV protection coatings keep the plastic safe from the sun’s rays. Apply these coatings after cleaning.
Use a UV sealant spray or cream made for headlights. Reapply every few months to keep protection strong.
- Clean headlights before applying coating
- Choose UV protection products for plastics
- Follow product instructions carefully
- Reapply every 3 to 6 months
Parking In Shade
Parking in the shade helps protect headlights from the sun. Less sun exposure means less yellowing and damage. Try to park under trees or covered areas.
If shaded parking is not possible, use a car cover. This helps block UV rays and keeps headlights clear longer.
When To Seek Professional Help
Cleaning your car’s headlights is usually a simple task. But sometimes, the damage is too much for DIY methods.
Knowing when to call a professional can save you time and money. Let’s explore when it’s best to get expert help.
Severe Damage Cases
If your headlights have severe damage, such as deep scratches or cracks, a professional should handle it. These issues can affect your visibility and safety on the road.
- Deep scratches that don’t buff out
- Visible cracks in the lens
- Condensation inside the headlight
Restoration Vs Replacement
Sometimes, restoring headlights is not enough. A professional can assess whether you need a full replacement or just a restoration.
| Situation | Recommendation |
| Minor fogging | Restoration |
| Severe yellowing | Replacement |
| Cracked lens | Replacement |
Cost Considerations
Professional services can be costly, but they ensure quality work. Consider your budget and the long-term benefits of professional help.
Frequently Asked Questions
How Often Should I Clean My Car Headlights?
Clean headlights every 3 to 6 months to maintain brightness. Frequent cleaning prevents dirt and oxidation buildup. Regular care improves nighttime visibility and safety while driving.
What Materials Are Best For Cleaning Headlights?
Use mild soap, water, microfiber cloth, and toothpaste or baking soda. These materials safely remove dirt and haze without damaging the plastic lens.
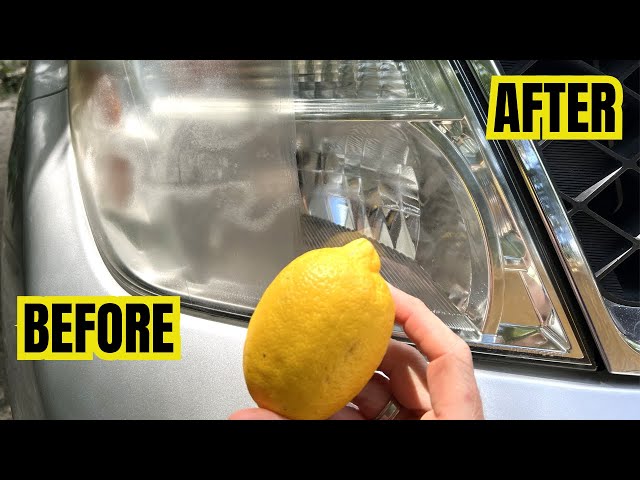
Can Household Items Restore Cloudy Headlights?
Yes, toothpaste or baking soda mixed with water can polish headlights. They gently remove oxidation and improve clarity without harsh chemicals or expensive kits.
Is It Safe To Use Sandpaper On Headlights?
Only use very fine sandpaper with caution. Wet-sanding can remove heavy oxidation but requires careful technique to avoid scratches or lens damage.
Conclusion
Cleaning your car’s headlights improves safety and looks better. Clear headlights help you see the road at night. Dirt and fog can block the light, making driving risky. Regular cleaning keeps your lights bright and working well. You only need a few simple tools to do it.
Spend a little time, and your headlights will shine like new. A clean car is easier to drive and safer for everyone. Try this easy task and enjoy clearer, brighter lights on every trip.


