
If you want your car to look brand new and turn heads wherever you go, detailing is the secret weapon you need. But where do you start?
What tools and steps will give your car that flawless shine? This guide breaks down everything you need to detail a car, making the process simple and effective for you. Whether you’re a beginner or want to up your game, you’ll discover tips that save time, protect your vehicle, and bring out its best look.
Keep reading to unlock the secrets that will make your car sparkle inside and out.
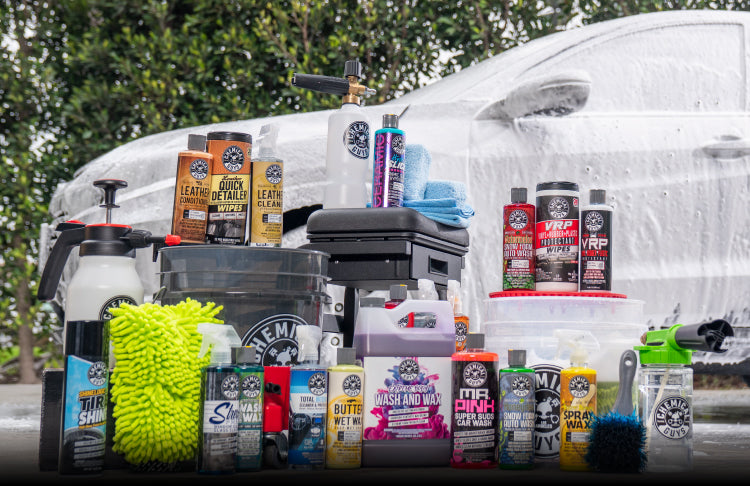
Credit: www.chemicalguys.com
Essential Tools For Car Detailing
Car detailing needs the right tools to clean and protect every part. Using the correct supplies helps achieve a shiny and fresh look.
Knowing which tools to use makes the process easier and faster. This guide covers the main tools needed for effective car detailing.
Cleaning Supplies And Products
Cleaning supplies are the base of car detailing. They remove dirt, grime, and stains from the car’s surface.
Using the right products protects the paint and finishes. Choose gentle cleaners made for cars to avoid damage.
- Car wash soap
- Wheel cleaner
- Glass cleaner
- All-purpose cleaner
- Microfiber towels
- Detailing brushes
Polishing And Buffing Equipment
Polishing removes small scratches and swirls on the paint. Buffing makes the surface smooth and shiny.
Using machines for polishing and buffing saves time and gives even results. Hand polishing is also an option for small spots.
- Dual-action polisher
- Polishing pads
- Buffing pads
- Polish compound
- Finishing polish
Vacuum And Interior Tools
A clean interior improves the car’s comfort and value. Vacuum tools remove dust, dirt, and crumbs from seats and floors.
Special brushes and cloths help clean vents, dashboards, and tight spaces. Use products safe for leather and fabric surfaces.
- Wet/dry vacuum cleaner
- Crevice tools
- Upholstery brushes
- Interior detailing cloths
- Leather cleaner and conditioner
Protective Gear And Accessories
Protective gear keeps you safe while working on the car. It also helps avoid mess and damage to clothes.
Accessories like buckets and foam guns make the cleaning process more organized and efficient.
- Gloves
- Safety glasses
- Apron or old clothes
- Wash buckets
- Foam cannon or foam gun
- Drying towels or chamois
Preparing Your Car For Detailing
Detailing a car needs good preparation. It helps get the best results. A clean and organized start saves time and effort.
This guide covers how to get your car ready. It explains where to work, what to check, and how to prepare your tools.
Choosing The Right Location
Select a place that is shaded and dry. Avoid direct sunlight to stop cleaning products from drying too fast. Choose a flat surface to park your car safely.
- Find a garage or covered area
- Pick a spot with good lighting
- Make sure the ground is clean and flat
- Keep away from dust and wind
- Have easy access to water and electricity
Initial Inspection And Assessment
Look over your car carefully before starting. Check for scratches, stains, and damage. This helps you plan the cleaning steps better.
| Area | Condition | Notes |
| Paint | Scratched | Needs polish |
| Windows | Dirty | Use glass cleaner |
| Interior | Stained seats | Use upholstery cleaner |
| Wheels | Brake dust | Apply wheel cleaner |
Gathering Materials And Setting Up
Collect all the supplies before you start. Having everything ready keeps you organized. Place tools close to the car for easy reach.
- Microfiber cloths and sponges
- Car wash soap and buckets
- Wax and polish products
- Vacuum cleaner and brushes
- Gloves and protective gear
Exterior Cleaning Techniques
Cleaning a car’s exterior keeps it looking fresh and protects the paint. Proper methods remove dirt and grime without damage.
Using the right tools and techniques improves the cleaning process and helps maintain the car’s finish for years.
Washing And Rinsing Methods
Start by rinsing the car to remove loose dirt. Use clean water and a gentle spray to avoid scratches.
Use a soft mitt or sponge with car shampoo. Wash from top to bottom to avoid dragging dirt across the paint.
- Rinse the car thoroughly before washing
- Use two buckets: one for soapy water, one for rinsing the mitt
- Wash in shaded areas to prevent soap from drying too fast
- Rinse often to remove soap and dirt
- Dry with a microfiber towel to avoid water spots
Removing Contaminants And Stains
Bird droppings, tree sap, and bug splatters can harm the paint. Clean these quickly to prevent damage.
| Contaminant | Removal Method | Notes |
| Bird Droppings | Soak with water and gently wipe | Do not scrub hard |
| Tree Sap | Use a sap remover or rubbing alcohol | Test on small area first |
| Bug Splatters | Apply bug cleaner and rinse | Remove soon after driving |
| Water Spots | Use vinegar solution or water spot remover | Dry car after washing |
Claying For Surface Preparation
Clay bars remove embedded dirt that washing misses. They make the surface smooth and ready for polishing or waxing.
Follow these tips for claying:
- Work on a cool, dry surface
- Lubricate the paint with clay lubricant or soapy water
- Rub the clay bar gently over the paint in straight lines
- Fold the clay to expose a clean surface often
- Wipe off residue with a microfiber cloth

Credit: www.amazon.ca
Paint Correction And Polishing
Paint correction and polishing make a car look shiny and new. They remove scratches, swirl marks, and dull spots.
This process improves the car’s finish and protects the paint for a longer time.
Identifying Paint Imperfections
Look closely at the car’s surface to find paint problems. Use good light and a clean cloth to see defects clearly.
Common imperfections include scratches, swirl marks, oxidation, and water spots. Knowing these helps you fix them correctly.
- Light scratches appear as fine lines on the paint
- Swirl marks look like small circular scratches
- Oxidation causes dull, chalky paint
- Water spots are mineral deposits left by drying water
Selecting The Right Polish
Choose a polish based on the type of paint problem. Some polishes remove deep scratches, others work on light swirls.
Check the polish’s abrasiveness and finish level. Use a softer polish for delicate paint and a stronger one for heavy damage.
- Heavy cutting polish for deep scratches
- Medium polish for moderate imperfections
- Finishing polish for shine and smoothness
- Non-abrasive polish for light cleaning and gloss
Machine Vs Hand Polishing
Machine polishing uses a rotary or dual-action tool to work faster and deeper. It needs skill to avoid paint damage.
Hand polishing is slower but safer. It is good for small areas and light imperfections. Use soft cloths and gentle pressure.
- Machine polishing: faster, more powerful, needs experience
- Hand polishing: slower, safer for beginners, good for detail work
- Always clean the surface before polishing
- Test polish and pad on a small area first
Applying Protective Coatings
Protective coatings keep your car’s paint safe from dirt and damage. They help maintain shine and prevent fading.
Using the right coating improves your car’s look and makes cleaning easier. Let’s explore the main types.
Waxing Basics And Benefits
Waxing is one of the oldest ways to protect car paint. It creates a thin layer on the surface to block water and dust.
Wax makes your car shine and adds a smooth feel. It also helps protect from sun damage and light scratches.
- Wax is easy to apply with a cloth or applicator pad
- It lasts from a few weeks to a couple of months
- Regular waxing keeps paint looking fresh
Sealants And Ceramic Coatings
Sealants are synthetic products that protect paint longer than wax. They form a strong shield against dirt and water.
Ceramic coatings are advanced liquid polymers. They bond to paint and create a very hard, glossy layer.
- Sealants last about 4 to 6 months
- Ceramic coatings can last years with proper care
- Both provide better protection from chemicals and scratches
Maintenance Tips For Longevity
Keep coatings effective by washing your car often with gentle soap. Avoid harsh chemicals that can break down coatings.
Dry your car with a soft towel to prevent water spots. Reapply wax or sealants as needed to maintain protection.
- Wash car every two weeks or after heavy dirt
- Use pH-balanced car shampoo
- Dry car completely after washing
- Apply new coating when old one wears off
Interior Detailing Steps
Interior detailing makes your car feel fresh and clean. It involves several important steps to ensure every part of your car’s interior is spotless.
Follow these simple steps to detail the interior of your car effectively. Each step focuses on a different part of the car’s interior.
Vacuuming And Dust Removal
Start by removing all dirt and dust using a vacuum. This step is crucial for a clean car interior. Make sure to use the right attachments for tight spaces.
Pay special attention to the seats, floor mats, and under the seats. These areas often collect the most dust and debris.
- Use a soft brush attachment for dashboard and vents.
- Vacuum seats thoroughly to remove crumbs and dirt.
- Check under mats for hidden debris.
Cleaning Upholstery And Carpets
Upholstery and carpets need special care to remove stains and odors. Use a fabric cleaner suitable for your car’s material.
Test the cleaner on a small area first to ensure it does not damage the fabric. Gently scrub the stains with a soft brush.
- Choose a cleaner for fabric or leather as needed.
- Scrub gently to avoid damaging the material.
- Rinse with a damp cloth to remove cleaner residue.
Dashboard And Trim Care
Dashboards and trims can collect dust and fingerprints. Use a microfiber cloth to wipe these surfaces clean.
Apply a dashboard cleaner to keep it looking shiny and new. This also helps protect against UV damage.
- Wipe with a microfiber cloth for a dust-free finish.
- Use a cleaner that offers UV protection.
- Polish with a soft cloth for extra shine.
Glass And Mirror Cleaning
Clean glass and mirrors for clear visibility while driving. Use a glass cleaner that does not leave streaks.
Wipe in circular motions to ensure all areas are covered. Use a separate cloth for drying to avoid smudges.
- Spray cleaner directly on the cloth, not the glass.
- Use circular motions to avoid streaks.
- Finish with a dry cloth for a spotless look.
Detailing Engine Bay And Wheels
Car detailing is more than just washing the exterior. It involves cleaning every part, including the engine bay and wheels. Understanding the right practices helps keep your car in top shape.
Detailing these areas requires specific techniques to ensure safety and effectiveness. Let’s explore how to detail the engine bay and wheels properly.
Safe Engine Cleaning Practices
Cleaning the engine bay can seem daunting, but it’s necessary for maintenance. Proper techniques prevent damage and enhance your car’s performance.
- Ensure the engine is cool before starting.
- Cover sensitive parts like the battery and air intake.
- Use a non-corrosive cleaner for best results.
- Rinse with low-pressure water to avoid damage.
Wheel And Tire Cleaning
Wheels and tires gather dirt and grime quickly. Regular cleaning keeps them looking new and prevents wear.
For effective cleaning, use a dedicated wheel cleaner. Scrub with a brush to remove stubborn dirt. Rinse thoroughly to ensure no cleaner residue remains.
Protecting And Dressing Surfaces
After cleaning, it’s important to protect surfaces to maintain their condition. Dressing products give a shiny finish and protect against UV rays.
| Surface | Product Type | Benefit |
| Tires | Tire Dressing | Prevents cracking |
| Plastic Trims | Trim Restorer | Revives color |
| Engine Plastics | Engine Dressing | Protects from heat |
Common Mistakes To Avoid
Detailing a car takes patience and the right approach. Avoiding common mistakes helps achieve the best results. Many people rush or skip important steps, which harms the finish.
Knowing what to avoid can save time and protect your vehicle. Focus on using proper products, preparing surfaces well, and allowing proper drying time.
Using Incorrect Products
Choosing the wrong products can damage your car’s paint or leave poor results. Not all cleaners, waxes, or polishes suit every vehicle or surface.
- Avoid household cleaners with harsh chemicals.
- Use car-specific shampoos and waxes.
- Check product labels to match your car’s paint type.
- Test new products on a small, hidden area first.
- Do not mix incompatible products together.
Skipping Surface Preparation
Cleaning and prepping the car surface is key. Dirt, grease, and old wax can stop new products from working well.
| Preparation Step | Why It Matters |
| Wash the car thoroughly | Removes dirt and grime |
| Clay bar treatment | Removes embedded contaminants |
| Dry completely | Prevents streaks and water spots |
| Remove old wax | Ensures new wax sticks properly |
Overlooking Drying And Curing
Skipping or rushing drying and curing times can ruin detailing work. Products need time to set and bond for protection and shine.
Follow these tips for drying and curing:
- Let each layer dry fully before applying the next.
- Avoid touching the surface until it cures.
- Keep the car in shade or a dust-free area while drying.
- Check product instructions for exact curing times.
Tips For Maintaining A Detailed Car
Keeping your car detailed helps it look new and protects its value. Regular care stops dirt and damage from building up.
Use simple habits and proper products to keep your car clean and shiny every day.
Regular Wash And Quick Detail
Wash your car often to remove dirt and dust. Quick details help fix small spots between washes.
- Use a gentle car shampoo and soft cloth
- Rinse thoroughly to avoid soap marks
- Dry with a microfiber towel to prevent scratches
- Apply a quick detailer spray for extra shine
- Clean windows and mirrors for clear vision
Protecting Against Environmental Damage
Sun, rain, and dirt can harm your car’s paint and finish. Use protection methods to keep your car safe.
| Type of Damage | Protection Method |
| UV rays | Apply wax or paint sealant |
| Bird droppings | Clean off quickly with water |
| Tree sap | Use special remover products |
| Rain spots | Dry car after rain |
Scheduling Routine Deep Details
Deep detailing cleans and protects all parts of your car. Schedule it every few months for best results.
Benefits of Routine Deep Detailing:
- Removes tough dirt and stains
- Restores paint shine and smoothness
- Protects interior fabrics and surfaces
- Improves car’s resale value
Plan your deep detail every 3 to 6 months depending on driving conditions.

Credit: www.amazon.ca
Frequently Asked Questions
What Are The Essential Tools For Car Detailing?
Essential tools include microfiber towels, brushes, a vacuum, clay bar, polishers, and quality cleaning products. These tools help clean, polish, and protect your car’s surfaces effectively, ensuring a professional finish every time.
How Often Should I Detail My Car?
Detail your car every 4 to 6 months to maintain its appearance and value. Regular detailing removes dirt, protects paint, and keeps interiors fresh, extending your vehicle’s lifespan and shine.
Can I Detail My Car At Home?
Yes, you can detail your car at home with the right tools and products. Follow step-by-step guides and use quality materials to achieve professional results without the high cost.
What Is The Difference Between Washing And Detailing A Car?
Washing removes surface dirt, while detailing involves deep cleaning, polishing, and protecting every part. Detailing enhances and preserves your car’s look beyond a simple wash, improving overall condition.
Conclusion
Car detailing keeps your vehicle clean and looking new. It protects paint, tires, and interiors from damage. Using the right tools and products makes a big difference. Regular care saves money on repairs later. Anyone can detail a car with some practice and patience.
Start small, learn step by step, and enjoy the results. Clean cars feel good to drive and show pride. Keep your car shining bright by detailing it often. Simple steps lead to great results every time.


