
If you’ve ever faced a stubborn part that just won’t budge during a car repair, you know how frustrating it can be. That’s where a pry bar becomes your best friend.
Knowing how to use a pry bar correctly can save you time, prevent damage to your vehicle, and make your repair job much easier. You’ll discover simple, practical tips to master this tool and tackle those tough spots with confidence.
Keep reading, and you’ll soon feel like a pro handling your car repairs like never before.
Choosing The Right Pry Bar
A pry bar is a useful tool for many car repair tasks. Picking the right pry bar helps you work safely and efficiently.
Different pry bars fit different jobs. Knowing their types, materials, and sizes will guide your choice.
Types Of Pry Bars
There are several types of pry bars. Each type serves a special purpose in car repair work.
- Flat Pry Bars: Thin and flat for tight spaces and panel removal.
- Curved Pry Bars: Have a bend for better leverage on bolts and parts.
- Gooseneck Pry Bars: Feature a curved neck to reach awkward areas.
- Alignment Pry Bars: Used to align parts during assembly.
Materials And Durability
Pry bars are made from strong materials that resist bending and breaking. Steel is the most common choice.
Look for pry bars with heat-treated or alloy steel. These last longer and hold their shape better.
- Carbon Steel: Strong and durable for heavy tasks.
- Alloy Steel: Offers extra strength and toughness.
- Chrome Vanadium: Resists corrosion and wear.
Size And Shape Considerations
Choose a pry bar size that fits your job. Longer bars give more leverage but can be harder to control.
The shape affects how the bar fits in small spaces and how much force you can apply.
- Short Bars: Good for tight spots and light work.
- Long Bars: Better for heavy prying and more force.
- Thin Tips: Reach narrow gaps easily.
- Wide Tips: Spread force over a larger area to avoid damage.

Credit: paulbhardware.com
Essential Safety Tips
Using a pry bar in car repair can help with many tasks. It is important to work safely to avoid accidents.
Follow these safety tips to protect yourself and others while using a pry bar.
Protective Gear To Wear
Always wear the right gear before using a pry bar. This gear protects your body from injury.
- Wear safety goggles to shield your eyes from flying debris.
- Use heavy-duty gloves to protect your hands from cuts and bruises.
- Wear steel-toed boots to protect your feet from falling objects.
- Consider a long-sleeve shirt to protect your arms from scratches.
Safe Handling Techniques
Hold and use the pry bar carefully to avoid slips and damage. Proper handling keeps you safe and makes the job easier.
- Check the pry bar for cracks or damage before use.
- Position the pry bar firmly against the object you want to move.
- Apply steady pressure without sudden force to avoid slips.
- Use your body weight for leverage, not just your arms.
- Keep your hands away from the prying point to avoid pinching.
Avoiding Common Injuries
Knowing how injuries happen helps you prevent them. Use these tips to stay safe.
| Injury Type | Cause | Prevention |
|---|---|---|
| Cut or Puncture | Sharp edges or slipping pry bar | Wear gloves and maintain firm grip |
| Eye Injury | Flying debris or sudden bar movement | Wear safety goggles at all times |
| Muscle Strain | Overexertion or poor body position | Use proper stance and leverage |
| Pinch Points | Fingers caught between bar and object | Keep hands clear of contact areas |
Basic Pry Bar Techniques
A pry bar is a simple tool that helps remove parts and open tight spaces in car repair. Using it correctly makes your work safer and easier.
Learn these basic techniques to use your pry bar well. This guide covers leverage, positioning, and how to use both ends of the tool.
Leverage And Positioning
Leverage is the force you apply using the pry bar. Position the bar so you get the most power with the least effort. Place the fulcrum close to the object you want to move.
- Place the pry bar tip under the edge of the part.
- Use a solid point as a fulcrum for better leverage.
- Pull the handle slowly to avoid damage.
- Adjust position if the tool slips or the force feels uneven.
Using The Claw End
The claw end is curved and split for pulling nails or prying parts apart. It works well for removing trim or panel clips without damage.
| Task | How to Use Claw End |
| Remove nails | Slide claw under nail head, pull handle back |
| Lift trim | Place claw under trim edge, pry gently |
| Separate panels | Insert claw between panels, twist slowly |
Using The Flat End
The flat end is straight and strong. Use it to push or lift parts without scratching them. It fits well into narrow spaces.
- Slide it under stuck parts to lift gently.
- Use it to spread or separate parts evenly.
- Apply steady pressure to avoid bending the tool.
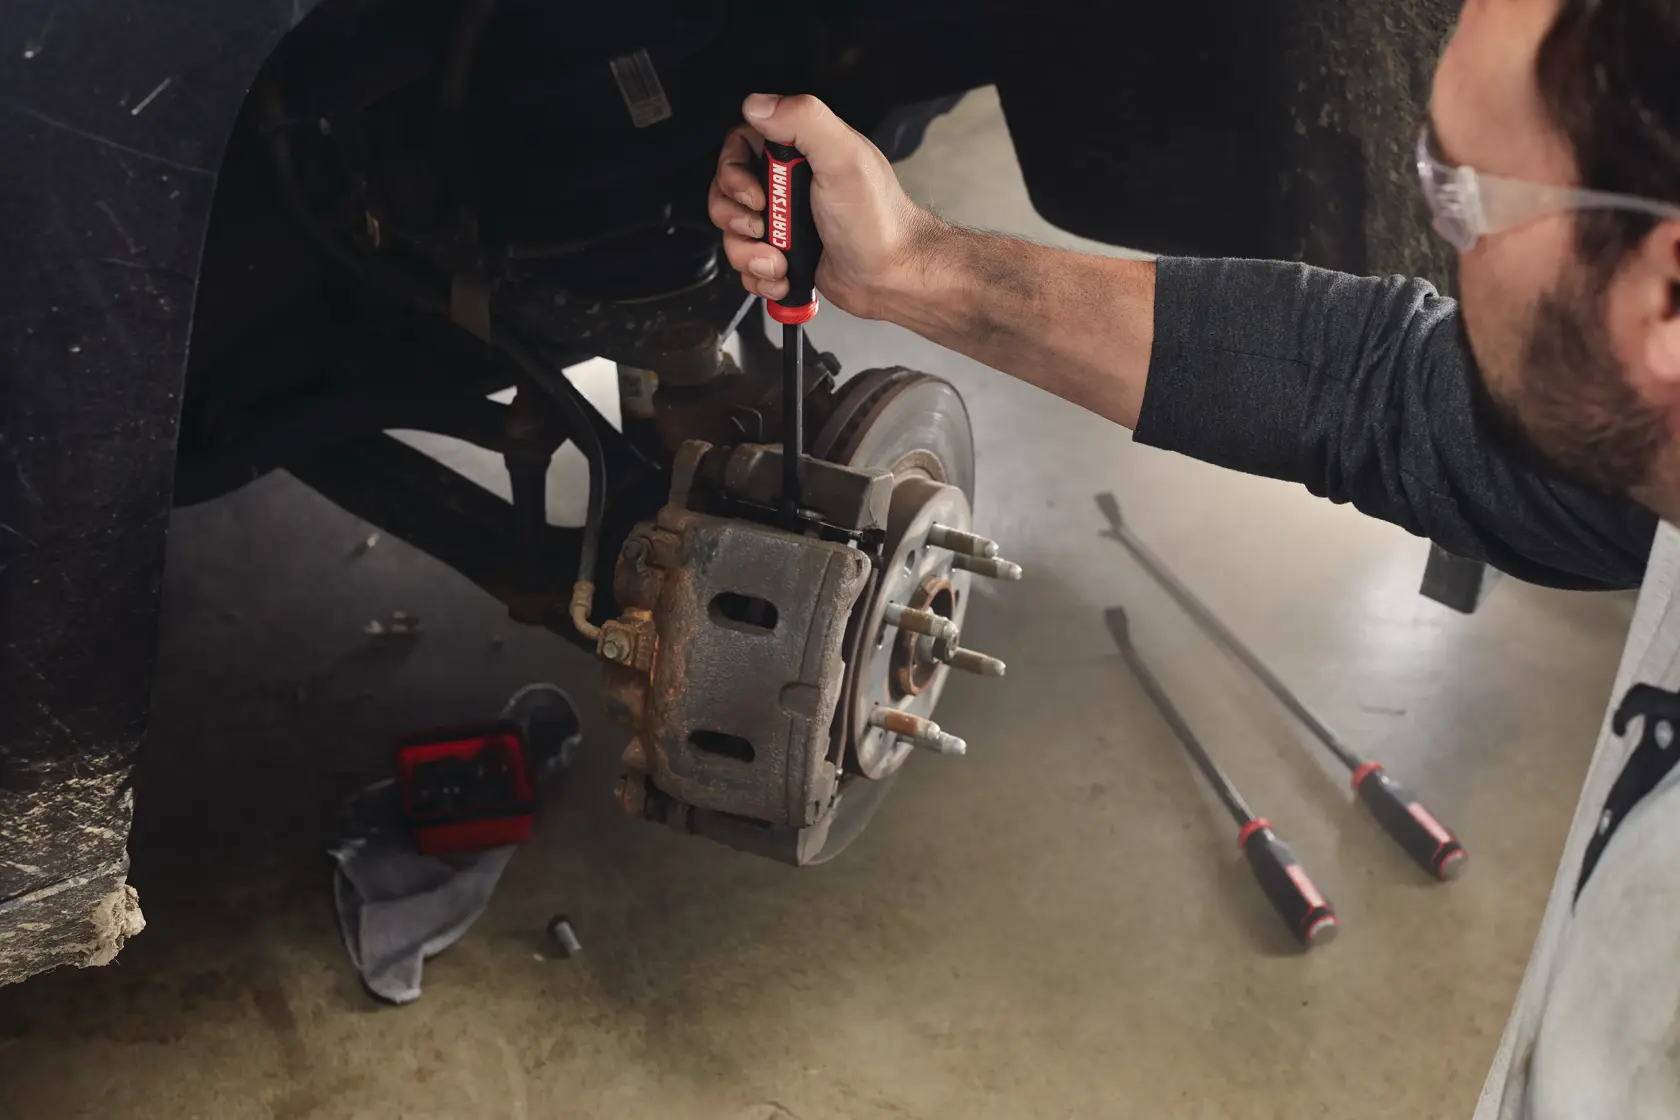
Credit: www.craftsman.com
Pry Bar Uses In Car Repair
A pry bar is a simple tool that helps in many car repair tasks. It uses leverage to move or lift parts safely.
This tool is common in workshops and is easy to handle for both beginners and experts.
Removing Trim And Molding
Use a pry bar to gently remove trim and molding without damage. It helps to loosen parts stuck from glue or clips.
- Place the pry bar under the edge of the trim
- Apply slow pressure to lift the molding
- Work along the trim to avoid breaking it
- Use a cloth to protect painted surfaces
Separating Components
A pry bar helps to separate parts that fit tightly, like panels or engine covers. It gives you space to work safely.
| Component | Common Issue | How Pry Bar Helps |
| Door Panels | Snug clips | Levers clips out without breakage |
| Engine Covers | Stuck seals | Creates gap to remove cover |
| Battery Holders | Tight clamps | Loosens clamps for removal |
Lifting And Aligning Parts
A pry bar can lift heavy parts slightly for fitting or alignment. It helps to position parts before securing them.
Tips for lifting and aligning:
- Insert pry bar under the part edge
- Lift slowly to avoid damage
- Adjust the part to the right position
- Hold steady while fastening bolts or screws
Troubleshooting Common Issues
Using a pry bar can make car repair tasks easier. It helps to move or remove parts that are stuck or hard to reach. But some problems may come up during the process.
This guide covers how to handle rusted parts, protect car panels, and know when to use extra tools. Follow these tips for safer and better repairs.
Dealing With Rusted Parts
Rusted parts stick tightly and can break if forced. Use rust remover sprays before using the pry bar. Let the spray sit for a while to loosen the rust.
- Spray rust remover on the affected area
- Wait 10-15 minutes for it to work
- Tap gently with the pry bar to test movement
- Apply steady pressure, not sudden force
- If stuck, apply more rust remover and wait
Avoiding Damage To Panels
Car panels can bend or scratch easily. Protect them by placing a piece of cloth or cardboard between the pry bar and the panel. Use the pry bar at the correct angle to reduce pressure.
| Common Panel Damage | Prevention Tips |
| Dents | Use padding under the pry bar |
| Scratches | Work slowly and gently |
| Paint Chips | Keep the pry bar clean and smooth |
When To Use Additional Tools
Sometimes a pry bar alone is not enough. Using extra tools can make the job safer and easier. Know which tools to add for common issues.
- Use a hammer to tap the pry bar gently
- Use a lubricant spray to loosen tight joints
- Use a heat gun to warm and soften rusted areas
- Use gloves to protect your hands from sharp parts

Credit: www.amazon.com
Maintenance And Care For Pry Bars
Pry bars are essential tools in car repair. Proper care ensures they last long and work efficiently.
Regular maintenance can prevent damage and keep your pry bar in top condition for all your car repair needs.
Cleaning After Use
After using your pry bar, cleaning it is crucial. Dirt and grime can cause rust and degrade the tool.
- Use a clean cloth to wipe off any dirt.
- Apply a mild cleaner if needed.
- Dry it thoroughly to prevent rust.
Storage Tips
Proper storage keeps your pry bar safe and ready for the next job. A good storage place prevents unwanted damage.
- Hang it on a tool rack.
- Store it in a dry toolbox.
- Avoid damp or humid areas.
When To Replace Your Pry Bar
Knowing when to replace your pry bar is essential. A damaged pry bar can be unsafe and ineffective.
| Sign | Action |
| Visible cracks | Replace immediately |
| Severe rust | Consider replacing |
| Bent shape | Use with caution or replace |
Frequently Asked Questions
What Is A Pry Bar Used For In Car Repair?
A pry bar helps remove parts, separate components, and create leverage. It’s essential for tasks like pulling trim and lifting heavy parts safely.
How Do I Safely Use A Pry Bar On My Car?
Use steady pressure and avoid sudden force. Position the pry bar carefully to prevent damage to parts or injury. Wear gloves and eye protection.
Can A Pry Bar Fix Dents Or Body Damage?
No, pry bars are not for fixing dents. They assist in removing or adjusting parts but don’t repair body damage directly.
Which Pry Bar Size Is Best For Car Repairs?
A medium-sized pry bar, around 12 to 18 inches, works well. It offers good leverage while being easy to handle in tight spaces.
Conclusion
Using a pry bar can make car repair tasks easier and faster. Always handle the tool with care to avoid damage or injury. Choose the right pry bar size for the job to get the best results. Practice proper technique to protect your car parts.
With patience and the right tool, many repairs become simpler. Keep your pry bar clean and store it safely after use. Small steps like these improve your repair experience and success. Keep learning and trying new tasks to build your skills.


