
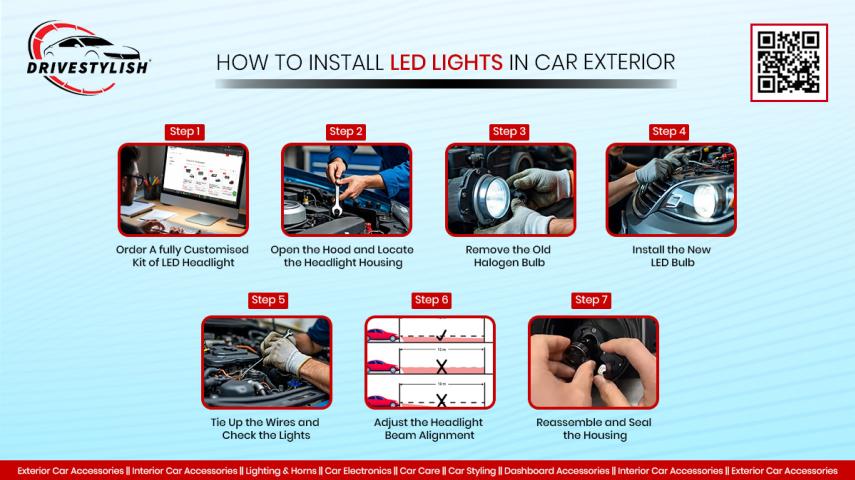
Want to make your car stand out with bright, eye-catching LED lights on the outside? Installing LED lights on your car’s exterior is easier than you think—and it can completely transform your ride’s look.
Whether you want better visibility or a cool custom style, this guide will show you exactly how to install LED lights step-by-step. By the end, you’ll have the confidence to upgrade your car yourself and turn heads wherever you go.
Ready to light up your car and take it to the next level? Let’s get started!
Choosing The Right Led Lights
Installing LED lights on your car exterior can improve visibility and style. Picking the right LED lights is important for safety and performance.
There are different types of LED lights for cars. You must also think about factors like brightness and fit. Knowing the legal rules helps you avoid fines.
Types Of Led Lights For Cars
LED lights come in many forms for car exteriors. Some common types include:
- Headlights – for front illumination
- Fog lights – help in poor weather
- Strip lights – for decoration and accents
- Turn signal lights – show your driving intentions
- Brake lights – alert drivers behind you
Factors To Consider
| Factor | Why It Matters | What to Check |
| Brightness | Visibility and safety | Choose brightness for road use |
| Color Temperature | Affects light color | Pick white or yellow for better vision |
| Size and Fit | Proper installation | Match LED size to your car lights |
| Power Consumption | Battery load | Use low power LEDs to save energy |
| Durability | Lasts longer | Look for waterproof and shockproof models |
Legal Restrictions
Each area has laws about which LED lights you can use. These rules keep all drivers safe on the road.
- Check if colored lights are allowed on car exterior
- Use approved LED lights for headlights and signals
- Avoid flashing or overly bright lights that distract others
- Follow placement rules for front, side, and rear lights

Credit: auxito.com
Gathering Necessary Tools
Installing LED lights on your car’s exterior needs the right tools. Preparing these tools first makes the job easier and safer.
Gather all items before starting. This helps avoid interruptions and mistakes during installation.
Basic Tools Required
These tools help you fit the LED lights properly. Each one has a specific role in the installation process.
- Screwdrivers (flathead and Phillips)
- Wire stripper and cutter
- Electrical tape
- Multimeter to check voltage
- Heat shrink tubing
- Zip ties for securing wires
- Drill with small bits
- Socket wrench set
Safety Equipment
Using safety gear protects you from injuries. It also keeps the work area safe.
| Equipment | Purpose |
| Safety Glasses | Protect eyes from debris and sparks |
| Insulated Gloves | Prevent electric shocks |
| Long Sleeves | Shield skin from cuts and burns |
| Non-slip Shoes | Provide stable footing while working |
| Face Mask | Keep dust and particles away from lungs |
Preparing The Car Exterior
Installing LED lights on your car’s exterior needs careful preparation. This helps the lights stick well and work safely.
Start by getting the car surface ready. Clean and find the best spots for the lights.
Cleaning The Surface
Clean the car surface where you will place the LED lights. Dirt and grease stop the lights from sticking properly.
Use soap and water to wash the area well. Then dry it with a clean cloth. For tough dirt, use rubbing alcohol.
- Wash the area with soap and water
- Dry the surface with a soft cloth
- Use rubbing alcohol to remove grease
- Make sure the surface is smooth and dry
Locating Installation Points
Pick the best spots on the car for the LED lights. Choose flat areas that are easy to reach.
Avoid places near moving parts or where water can get in. Good spots include under the bumper or around the headlights.
- Choose flat surfaces for better adhesion
- Avoid moving parts like doors or wheels
- Stay clear of water-exposed areas
- Check if wiring can reach the spots easily
Credit: www.promoteproject.com
Wiring The Led Lights
Installing LED lights on your car exterior needs careful wiring. This process helps the lights work safely and properly.
We will cover the basics of car wiring, how to connect the power, and how to keep the wires secure.
Understanding Car Wiring
Car wiring carries electricity to different parts of your car. It has positive and negative wires. Positive wires bring power, and negative wires connect to the ground.
- Find the car’s fuse box and wiring diagram.
- Use a multimeter to test wires before connecting.
- Identify the wires that supply power and ground.
- Check if the wire can handle extra load from the LED lights.
Connecting To Power Source
Choose a power source that turns on with the car. This helps the LED lights work only when the car is running.
| Power Source | Where to Find | Notes |
| Fuse Box | Under dashboard or engine bay | Use add-a-fuse for safe connection |
| Battery | Engine compartment | Needs inline fuse for protection |
| Headlight Wire | Near front lights | Turns on with headlights |
Securing The Wires
Securing wires stops damage and keeps the lights working. Loose wires can short-circuit or break.
- Use zip ties to bundle wires neatly.
- Keep wires away from hot or moving parts.
- Wrap connections with electrical tape or heat shrink tubing.
- Check all connections are tight and insulated.
- Test the lights before finalizing wire placement.
Mounting The Led Lights
Installing LED lights on your car’s exterior can be a fun project. It adds style and improves visibility. Follow these steps to mount the lights properly.
Ensure you have all tools and materials ready before starting. This includes LED lights, screws, adhesive, and a power source.
Positioning The Lights
Decide where you want to place the LED lights on your car. Common areas include under the car body, around the headlights, and along the sides.
Position the lights so they do not block important parts. Ensure they enhance the car’s look without distracting other drivers.
Fixing Methods
Use screws or strong adhesive to fix the LED lights in place. Screws provide a more secure hold, especially in areas exposed to wind and water.
Adhesive is useful for temporary setups or less exposed areas. Make sure the adhesive is weather-resistant to last longer.
Testing The Placement
Before finalizing, test the light placement by turning them on. Check if they illuminate the intended areas without causing glare.
Adjust the lights if needed. Ensure all connections are secure and the lights function properly.
- Check lights from a distance for optimal placement
- Ensure wires are tucked safely and neatly
- Test during both day and night for effectiveness
Final Testing And Troubleshooting
After installing LED lights on your car’s exterior, you must test them carefully. Testing ensures they work properly and safely.
Troubleshooting helps fix any problems before you finish the installation. It saves time and prevents damage.
Checking Light Functionality
Turn on the car’s power and activate the LED lights. Look closely to see if all lights shine bright and steady.
Check every light strip and bulb, including turn signals, brake lights, and running lights. Make sure each one works as expected.
- Check brightness and color consistency
- Test each light mode, like blinking or steady
- Look for flickering or dim spots
- Ensure lights turn off with the car
Common Issues And Fixes
Sometimes LED lights may not work right after installation. Identifying common issues helps fix them quickly.
Use this list to check for problems and find easy solutions to get your lights working well.
- Lights do not turn on:Check fuses and wiring connections for loose or broken parts.
- Lights flicker:Secure all wires and ensure the battery voltage is stable.
- One side is dimmer:Inspect the ground connection and clean any corrosion.
- Lights stay on:Test the switch and relay for faults, replace if needed.
- Colors are wrong:Confirm you connected the correct wires to the right LED sections.

Credit: auxito.com
Frequently Asked Questions
How Do I Choose The Right Led Lights For My Car Exterior?
Select LED lights based on brightness, color temperature, and size. Ensure compatibility with your car’s electrical system and exterior design.
What Tools Are Needed To Install Led Lights On A Car?
You need screwdrivers, wire strippers, electrical tape, connectors, and a multimeter for safe and effective installation.
Can I Install Led Lights On My Car Without Professional Help?
Yes, with proper instructions and tools, DIY installation is possible. Follow safety guidelines to avoid damage or injury.
How Do I Wire Led Lights To My Car Battery Safely?
Disconnect the battery first. Use a fuse and proper connectors. Secure all wires to prevent shorts or disconnections.
Conclusion
Installing LED lights on your car exterior is simple and rewarding. Choose the right lights and tools before starting. Follow each step carefully for a safe setup. Test the lights to ensure they work well. Bright LEDs improve your car’s look and visibility.
Enjoy the new style and safety on the road. Small effort, big difference. Keep your car shining bright!


