
You’ve decided it’s time to remove the window tint from your car, but you’re not sure where to start. Maybe the tint has bubbled, peeled, or just doesn’t look the way you want anymore.
Removing it might seem tricky, but it doesn’t have to be. In this guide, you’ll discover simple, step-by-step methods to get your windows clear again—without damaging your glass or spending a fortune. Keep reading, and you’ll learn how to make your car look fresh and clean in no time.
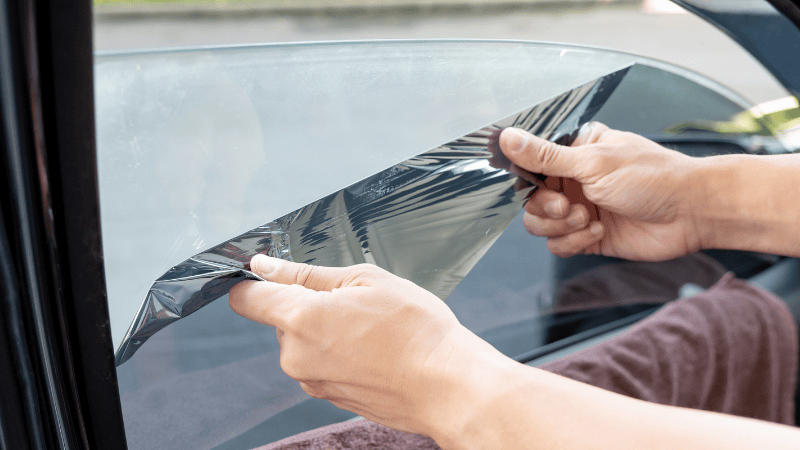
Credit: carlikefilm.com
Tools Needed
Removing window tint from your car requires the right tools. Using proper supplies makes the job easier and safer.
This guide covers the basic supplies and optional equipment you can use for tint removal.
Basic Supplies
These are the main tools you need to remove window tint effectively.
- Spray bottle filled with soapy water
- Sharp utility knife or razor blade
- Plastic scraper or tint removal tool
- Clean microfiber cloths
- Heat gun or hair dryer
- Ammonia or commercial tint remover solution
Optional Equipment
These extra tools can help speed up the process or protect your car’s surfaces.
| Equipment | Purpose |
| Gloves | Protect hands from chemicals |
| Painter’s tape | Mark edges and protect trim |
| Plastic bag | Cover and soak tint with ammonia |
| Face mask | Reduce inhaling fumes |
| Hair dryer stand | Hold heat gun steady for even heating |

Credit: www.youtube.com
Preparation Steps
Removing window tint from a car needs good preparation. Proper steps make the job easier and cleaner.
Start by getting your car ready. Clean the window and protect areas around it before you begin.
Clean The Window
Cleaning the window removes dirt and dust. This helps the tint peel off smoothly without scratches.
Use a glass cleaner and a soft cloth. Wipe the whole window surface well and let it dry completely.
Protect Surrounding Areas
Protect parts near the window from water and tools. Use tape and plastic sheets to cover these areas.
- Cover door handles and trims with painter’s tape
- Use plastic or paper to shield the car interior
- Remove or move objects close to the window
Using Heat Method
Removing window tint from a car can be done using heat. Heat softens the adhesive, making it easier to peel off the film.
This method is safe and effective if done carefully. It saves time compared to other removal methods.
Applying Heat Safely
Use a heat gun or a hair dryer to warm the tint film. Hold it about 6 to 8 inches from the glass.
Move the heat source slowly over the window. Avoid staying too long in one spot to prevent glass damage.
- Keep the heat gun moving constantly
- Do not overheat the glass
- Wear gloves to protect your hands
- Work in a well-ventilated area
Peeling Off Tint
Once the tint is heated, start peeling at a corner. Use your fingernail or a plastic scraper to lift the edge.
Pull the film slowly and steadily. If it resists, apply more heat and try again.
- Peel the tint at a low angle
- Remove all adhesive residue with a cleaner
- Use a razor blade carefully to remove stuck pieces
Using Soapy Water Method
Removing window tint from a car can be done with simple tools. The soapy water method is safe and effective.
This method helps loosen the tint film and adhesive for easy removal.
Mixing Solution
Prepare a soapy water solution to spray on the tinted window. It softens the adhesive under the tint.
Use mild dish soap and warm water for the best results.
- Fill a spray bottle with warm water
- Add two tablespoons of dish soap
- Shake gently to mix the solution
- Keep the spray bottle ready for use
Scraping Tint Carefully
Spray the soapy water on the tint to loosen it. Let it sit for a few minutes before scraping.
Use a plastic scraper or a credit card to peel the tint slowly and avoid scratching the glass.
- Spray a generous amount of soapy water on the tint
- Wait 5 to 10 minutes to soften the adhesive
- Start at one corner and lift the edge carefully
- Slide the scraper under the tint and pull gently
- Keep spraying soapy water as you work
- Remove all tint pieces without rushing
Using Ammonia Method
Removing window tint from your car can be done with household items. Ammonia is a common choice. It helps loosen the adhesive under the tint film.
This method requires care and patience. Follow the instructions to avoid damage to your car windows.
Applying Ammonia
Begin by preparing your workspace and gathering materials. Ammonia should be used in a well-ventilated area. Protect your skin and eyes with gloves and goggles.
- Cut a large plastic bag to cover the inside of the window.
- Spray ammonia generously inside the bag to soak the tint film.
- Seal the bag tightly on the window to trap the ammonia.
- Leave it for at least 30 minutes to let the ammonia work.
- Check if the tint has softened by gently lifting a corner.
Removing Residue
After removing the tint film, sticky residue may remain on the glass. Use these steps to clean it off safely.
| Item | Purpose |
| Glass cleaner | Breaks down adhesive residue |
| Plastic scraper | Removes residue without scratching |
| Microfiber cloth | Wipes and polishes glass |
| Warm water | Rinses the glass |
Spray glass cleaner on the window. Use the plastic scraper to gently lift the residue. Wipe with the microfiber cloth. Repeat as needed, then rinse with warm water.
Cleaning After Tint Removal
After removing window tint from your car, it’s important to clean the windows thoroughly. This ensures clear visibility and keeps your car looking its best.
Cleaning after tint removal involves removing adhesive residue and performing a final window cleaning. These steps will help maintain the clarity of your car windows.
Removing Adhesive Residue
Adhesive residue can be stubborn. Use a glass cleaner and a soft cloth to wipe it away. Applying a bit of rubbing alcohol can help dissolve the adhesive.
Be patient and gentle to avoid scratching the glass. Repeat the process until all residue is removed.
- Spray glass cleaner on the residue
- Use a soft cloth to wipe gently
- Apply rubbing alcohol for tough spots
- Repeat as necessary
Final Window Cleaning
Once the adhesive is gone, clean the windows for a streak-free shine. Use a glass cleaner and a microfiber cloth.
Ensure all areas are clean to prevent streaks. This gives your windows a clear and polished look.
- Spray glass cleaner on the window
- Wipe with a microfiber cloth
- Check for streaks and wipe again if needed
Tips For Easy Removal
Removing window tint from your car can seem daunting. With the right tips, it becomes simple.
Follow these steps to remove window tint easily and safely.
Work In Warm Conditions
Heat makes tint removal easier. Warm temperatures loosen the adhesive.
Sunlight helps when removing tint. It softens the film for better peeling.
- Park your car in a sunny spot
- Use a hairdryer to warm the tint
- Avoid removing tint in cold weather
Be Patient And Gentle
Patience is key during tint removal. Rushing can cause window damage.
Peel the tint slowly and gently. This prevents scratches and tears.
- Start peeling from a corner
- Use a plastic scraper for stubborn spots
- Apply adhesive remover for leftover glue

Credit: www.youtube.com
When To Seek Professional Help
Removing window tint from a car can be tricky. Sometimes, it is best to get help from a professional.
Knowing when to ask an expert will save your car’s windows and save you time.
If The Tint Is Old Or Damaged
Old or damaged tint can be hard to remove. It may leave glue or scratches on the glass.
Professionals have the right tools to remove old tint safely without harming the window.
When You Lack Proper Tools
Removing tint needs special tools like heat guns and scrapers. Using wrong tools can cause damage.
- Heat gun for softening adhesive
- Plastic scrapers to avoid scratches
- Cleaning solutions for residue
If you do not have these, a professional can do the job safely.
If You Want Perfect Results
Professionals remove tint smoothly and cleanly. They avoid bubbles and glue marks.
- Saves time and effort
- Protects car windows from damage
- Ensures clean and smooth glass surface
When Legal Or Safety Concerns Exist
Some states have rules about tint darkness and removal. Professionals know these laws.
They also ensure safe removal without harming window visibility or car safety features.
Frequently Asked Questions
How Long Does It Take To Remove Car Window Tint?
Removing window tint usually takes 30 to 60 minutes per window. Time depends on tint type and removal method used. Professional removal is faster and safer for your glass and car.
What Tools Do I Need To Remove Window Tint?
You need a heat gun or hairdryer, razor blade, spray bottle, and soapy water. These help soften the adhesive and carefully scrape off the tint without damage.
Can I Remove Window Tint Myself Safely?
Yes, you can safely remove tint at home with patience and the right tools. Avoid rushing and use gentle scraping to prevent glass scratches or damage.
Will Window Tint Removal Damage My Car Windows?
Proper removal won’t damage your windows. Using heat softens adhesive, making tint peel off cleanly. Avoid sharp tools or excessive force to protect glass.
Conclusion
Removing window tint from your car takes time and patience. Use the right tools and follow safe steps. Warmth and gentle scraping help peel off the tint smoothly. Clean the glass well to remove any leftover glue. Doing it yourself saves money and gives good results.
Take breaks if needed to avoid mistakes. Soon, your windows will look clear and fresh again. Keep these tips in mind for a smooth tint removal process.


