
Your car’s leather seats add a touch of luxury and comfort, but what happens when those seats develop holes? Cleaning leather with holes can feel tricky—you want to keep your seats looking great without causing more damage.
If you’ve been wondering how to tackle this delicate task, you’re in the right place. You’ll discover simple, effective steps to clean your car’s leather seats safely, even when they have holes. Keep reading to learn how to protect and refresh your seats, making your car’s interior look its best again.

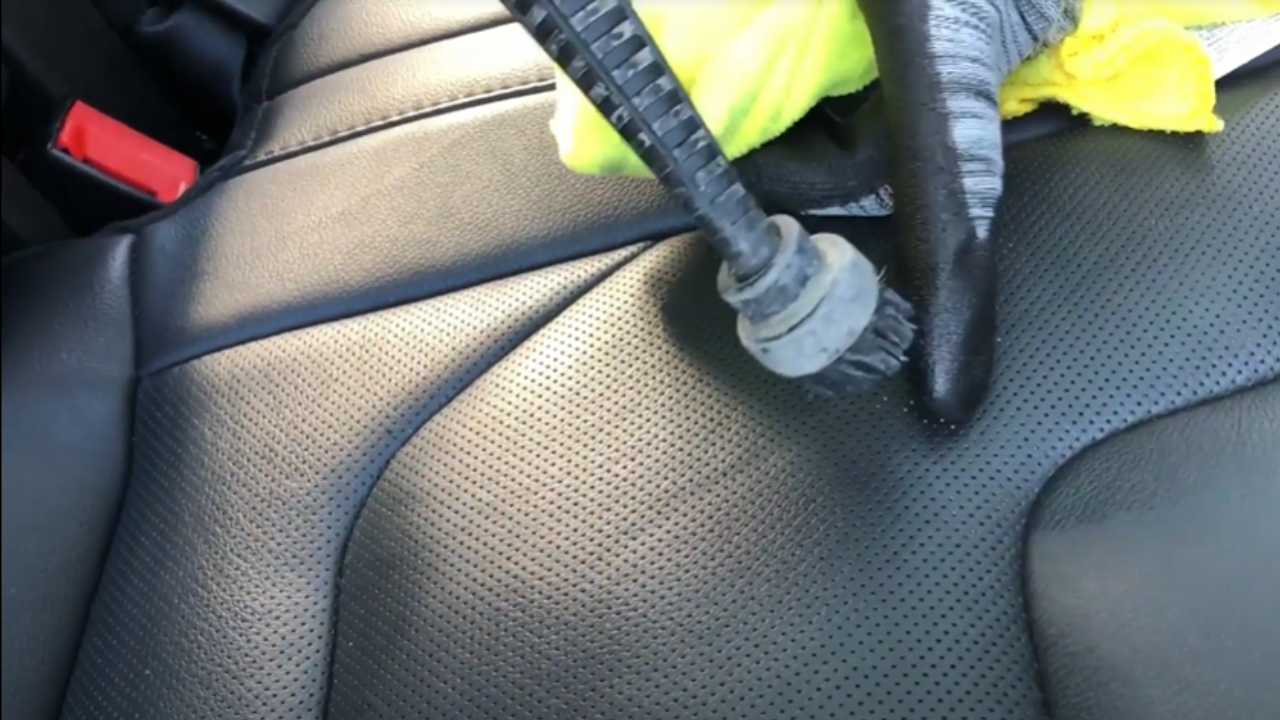
Credit: apexautopros.com
Assessing Damage On Leather Seats
Leather seats can develop holes from wear and tear. It is important to check the damage before cleaning.
Understanding the type and size of holes helps decide the best cleaning and repair methods.
Identifying Types Of Holes
Holes on leather seats vary in shape and cause. Some are small punctures, others are tears or worn spots.
Knowing the hole type helps choose the right cleaning tools and repair products.
- Punctures:Small round holes from sharp objects.
- Tears:Longer cuts or splits in the leather.
- Worn Spots:Areas where leather is thin or frayed.
- Cracks:Fine lines that can expand into holes.
Evaluating Leather Condition
Check if the leather is dry, stiff, or soft around the holes. This affects cleaning methods.
Look for discoloration and firmness to decide if the leather needs extra care.
- Dry Leather:Feels rough and cracks easily.
- Stiff Leather:Hard to bend and may tear more.
- Soft Leather:Flexible but may be weak near holes.
- Discolored Leather:May need special cleaners to avoid damage.
Credit: limelightdetail.com
Gathering Necessary Tools And Materials
Cleaning car leather seats with holes needs special care. You must have the right tools and materials before you start.
This helps to fix the holes and clean the leather without causing more damage. Prepare everything for a smooth process.
Leather Repair Kits
Leather repair kits help fix holes and tears in car seats. They usually come with patches, adhesives, and color compounds.
Choose a kit that matches your leather color and type. This makes the repair less visible and stronger.
- Leather patches to cover holes
- Adhesive glue to attach patches
- Color compounds to blend repairs
- Texture sheets for surface finish
- Instruction manual for guidance
Cleaning Supplies
Cleaning the leather before repair removes dirt and oils. Use gentle cleaning products made for leather.
Avoid harsh chemicals that dry out or damage leather. Soft cloths and brushes help clean without scratching.
- Leather cleaner or mild soap
- Soft microfiber cloths
- Soft-bristled brush
- Clean water for rinsing
- Leather conditioner to protect
Protective Gear
Protective gear keeps you safe while cleaning and repairing. It also prevents dirt from spreading to other parts.
Wear gloves and work in a well-ventilated area. This avoids contact with chemicals and inhaling fumes.
- Disposable gloves to protect skin
- Safety glasses for eye protection
- Mask to avoid inhaling fumes
- Old clothes or apron to protect clothing
Cleaning Leather Seats Before Repair
Cleaning your car’s leather seats is important before fixing holes. Dirt and dust can stop the repair from sticking well. A clean surface helps the leather repair last longer.
Use gentle methods to clean the leather. Strong cleaners or rough scrubbing can cause more damage. Follow these steps to prepare your leather seats for repair.
Removing Surface Dirt And Debris
Start by removing loose dirt and debris from the seat. Use a soft brush or vacuum cleaner with a soft brush attachment. This stops dirt from scratching the leather during cleaning.
Gently wipe the surface with a clean, dry microfiber cloth. Avoid pressing hard to keep holes from getting bigger. This step prepares the seat for deeper cleaning.
Choosing The Right Leather Cleaner
Choose a cleaner made for leather seats. Avoid harsh chemicals like bleach or ammonia. These can dry out and damage the leather.
- Pick pH-balanced leather cleaners
- Test cleaner on a hidden spot first
- Use a soft cloth or sponge to apply
- Do not soak the leather with too much liquid
Drying Techniques
After cleaning, dry the seat carefully. Use a dry microfiber cloth to blot away moisture. Do not rub hard over holes.
| Drying Method | Why Use It |
| Air Dry | Prevents heat damage and keeps leather soft |
| Soft Cloth Blotting | Removes surface moisture gently without stretching |
Repairing Small Holes And Tears
Small holes and tears in car leather seats can get worse if left untreated. Fixing them quickly keeps your seats looking neat. You will need some simple tools and materials to start the repair.
This guide shows how to apply leather filler, sand the area smooth, and match the color. Each step helps restore your seat’s surface and strength.
Applying Leather Filler
Leather filler fills small holes and tears to create a smooth surface. Clean the damaged area first and remove loose fibers. Use a palette knife to apply the filler in thin layers.
- Apply the first thin layer of filler inside the hole or tear.
- Let the filler dry completely, usually 20-30 minutes.
- Add more layers if needed until the surface is level with the seat.
- Allow the final layer to dry fully before sanding.
Sanding And Smoothing
After the filler dries, sand the area to make it smooth and even. Use fine-grit sandpaper for best results. Sand gently to avoid damaging the leather around the repair.
| Sandpaper Grit | Use |
|---|---|
| 400 | Initial sanding to remove excess filler |
| 600 | Fine sanding for smooth finish |
| 800 | Final touch to blend with leather |
Color Matching And Blending
Matching the color of your leather seat is key to a good repair. Choose a leather dye that matches your seat. Test the dye on a hidden area first.
- Apply the dye in thin coats using a small sponge or brush.
- Let each coat dry before adding the next one.
- Blend the edges of the repair into the surrounding leather.
- Finish with a leather conditioner to keep the area soft.
Fixing Larger Holes And Damage
Large holes in car leather seats need careful repair. Using the right tools and materials helps restore the seat’s look and strength.
Leather patch kits offer a good way to fix bigger damage. Follow these steps to get a smooth repair.
Using Leather Patch Kits
Leather patch kits contain patches, glue, and color compounds. These kits match your seat’s color and texture. Clean the area around the hole first. Cut the patch to cover the hole with some overlap. Apply glue on the patch and the seat surface. Press the patch firmly over the hole.
Securing The Patch
After placing the patch, secure it well to prevent peeling. Use these tips for best results:
- Press the patch down firmly for several minutes.
- Use a heavy flat object to hold it in place while drying.
- Keep the seat dry and avoid movement during curing.
- Follow the glue drying time from the patch kit instructions.
Finishing Touches
Once the patch is secure, work on blending it with the seat. Use color compounds from the kit to match the leather. Apply thin layers and let each dry before adding more. Lightly buff the area for a smooth look. Protect the repaired spot with leather conditioner to keep it soft.
| Task | Tip |
| Cleaning | Use mild soap and water, dry fully |
| Applying Patch | Cut slightly larger than hole |
| Pressing Patch | Use flat, heavy object |
| Color Matching | Apply thin layers, dry between coats |
| Conditioning | Use leather conditioner after repair |
Maintaining Leather Seats After Repair
Leather seats give your car a luxurious look. Keeping them in good condition is essential. After repairing leather seats, maintenance is key. This guide helps you maintain your leather seats effectively.
Regular Cleaning Routine
Cleaning your leather seats regularly keeps them looking new. Use a soft cloth to wipe them down. Avoid harsh chemicals that might damage the leather.
- Dust seats weekly with a dry cloth
- Use a leather cleaner once a month
- Remove stains promptly to prevent damage
Applying Leather Conditioner
Leather conditioner keeps seats soft and prevents cracks. Apply it every few months for best results. Choose a conditioner suitable for your leather type.
- Test conditioner on a hidden spot first
- Apply with a soft cloth in a circular motion
- Let it absorb for a few hours before use
Preventing Future Damage
Protecting your leather seats from damage is important. Avoid placing sharp objects on them. Use seat covers when necessary to shield from spills and dirt.
- Park in shaded areas to avoid sun damage
- Keep pets off the seats to prevent scratches
- Use seat covers during long trips

Credit: www.reddit.com
Frequently Asked Questions
How Do I Clean Leather Seats With Holes Safely?
Use a gentle leather cleaner and a soft cloth to avoid worsening the holes. Avoid excess water, and test products on a hidden area first. Clean gently around the holes to prevent damage and maintain the leather’s condition.
What Products Work Best For Leather Seats With Holes?
Choose pH-balanced, leather-specific cleaners and conditioners. Avoid harsh chemicals or abrasive materials. Products with moisturizing agents help preserve leather flexibility and prevent further cracking around holes.
Can I Repair Holes Before Cleaning Leather Seats?
Yes, small holes can be patched with leather repair kits before cleaning. Repairing first prevents dirt from settling in the holes and improves cleaning results.
How Often Should I Clean Leather Seats With Holes?
Clean leather seats every 3-6 months to maintain condition. More frequent cleaning may be needed if holes expose padding or fabric beneath, which can trap dirt.
Conclusion
Cleaning leather seats with holes takes patience and care. Use gentle cleaners and soft cloths to avoid damage. Repair small holes before deep cleaning for best results. Regular maintenance helps keep seats looking fresh and lasting longer. Treat your car seats with kindness and watch them improve.
Simple steps make a big difference in seat care. Keep your leather clean and comfortable every day.


