
Are you tired of struggling with your car’s outdated radio or worrying about blind spots when backing up? Upgrading your car radio and adding a backup camera can change the way you drive, making every trip safer and more enjoyable.
Imagine having clear sound for your favorite music and a sharp view behind your vehicle with just one simple installation. This guide will walk you through everything you need to know to upgrade your car’s tech easily and confidently. Keep reading to discover how you can transform your driving experience starting today.
Choosing The Right Car Radio
Installing a new car radio can improve your driving experience. It lets you enjoy music and stay connected safely.
Choosing the right radio depends on your needs and your car’s setup. This guide helps you pick the best option.
Types Of Car Radios
Car radios come in many styles. Each type offers different functions and fits different car models.
- Single-DIN radios fit smaller spaces and have basic functions.
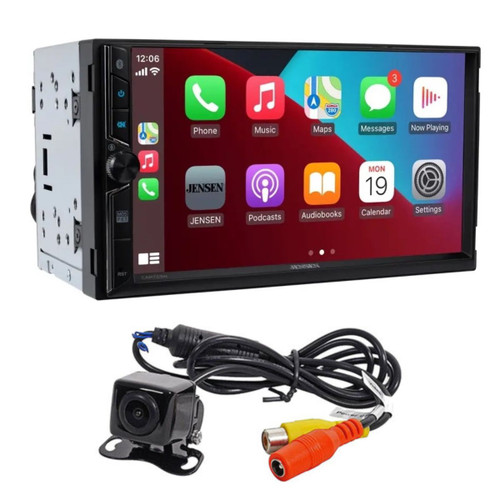
- Double-DIN radios are larger and often include touchscreens.
- Digital radios support modern features like Bluetooth and apps.
- Satellite radios receive signals from satellites for wide coverage.
Features To Consider
Look for features that match how you use your car radio. Some are for music lovers, others for tech fans.
- Bluetooth lets you play music wirelessly and make hands-free calls.
- Touchscreen controls are easier to use while driving.
- USB and AUX ports allow you to connect other devices.
- GPS navigation helps you find routes without extra devices.
- Backup camera support shows rear views when reversing.
Compatibility With Your Vehicle
Your new car radio must fit your vehicle’s size and wiring. Check these details before buying.
- Measure your dashboard opening to pick single or double-DIN size.
- Verify your car’s wiring harness matches the radio’s connectors.
- Some cars need extra adapters for steering wheel controls.
- Make sure the radio supports your car’s backup camera system.
- Check power requirements to avoid electrical issues.

Credit: www.seicane.com
Selecting A Backup Camera
A backup camera helps you see behind your car. It makes parking and reversing safer. Choosing the right camera is important for clear views and ease of use.
This guide covers camera types, wired or wireless options, and features like night vision and weather resistance.
Camera Types And Views
Backup cameras come with different views. Some show a wide angle to cover more area. Others have a normal or zoomed view for detail.
- Wide-angle cameras show a large area behind the car.
- Normal view cameras provide a standard rear image.
- Zoomed cameras focus on specific spots behind the vehicle.
- Some cameras offer multiple view modes to switch between.
Wired Vs Wireless Cameras
Backup cameras can connect to your display using wires or wirelessly. Both types have pros and cons.
| Type | Advantages | Disadvantages |
| Wired | Stable signal, no interference | Harder to install, visible cables |
| Wireless | Easy installation, no cables | Signal can drop, needs power source |
Night Vision And Weather Resistance
Night vision helps you see clearly in the dark. Weather resistance protects the camera from rain, snow, and dust.
- Infrared LEDs provide clear night images.
- Look for cameras rated IP67 or higher for water resistance.
- A good camera works well in all weather conditions.
Tools And Materials Needed
Installing a car radio and backup camera needs the right tools and materials. You must prepare before starting the job.
This guide covers the essential tools, extra supplies, and safety gear you will need for a smooth installation.
Essential Installation Tools
These tools help you remove old parts and install the new radio and camera. Having them ready saves time.
- Screwdrivers (flathead and Phillips)
- Wire strippers and cutters
- Crimping tool for connectors
- Socket wrench set
- Panel removal tool
- Multimeter to check electrical connections
- Electrical tape and heat shrink tubing
Additional Supplies
Besides tools, you need some extra items for the installation. These supplies make connections safe and neat.
- Car radio wiring harness adapter
- Backup camera mounting bracket
- Fuse taps or inline fuses
- Zip ties to organize wires
- Electrical connectors and terminals
- Double-sided tape or mounting pads
- Cleaning cloth for surfaces
Safety Gear
Safety gear protects you during the installation. Always use these items to avoid injuries.
- Safety glasses to protect your eyes
- Insulated gloves for handling wires
- Mask to avoid dust and debris
- Proper lighting to see clearly
- Non-slip shoes for stable footing
Preparing Your Vehicle
Before installing a car radio and backup camera, prepare your vehicle properly. Taking time to get ready helps make the installation safe and smooth.
Careful preparation prevents damage to your vehicle and ensures all parts fit well. Follow the key steps below to start.
Disconnecting The Battery
Disconnect the battery to avoid electric shocks and short circuits during installation. Use a wrench to remove the negative terminal first, then the positive.
Keep the terminals apart to prevent accidental contact. This step protects both you and your vehicle’s electrical system.
Removing Old Equipment
Take out the old radio and backup camera carefully. Remove any screws or clips that hold the equipment in place.
- Use a panel remover tool to avoid damage
- Disconnect all wiring harnesses gently
- Keep screws and parts organized for reuse
- Check for hidden fasteners behind panels
Clearing Installation Area
| Task | Details |
| Clean surfaces | Remove dust and dirt to ensure good connections |
| Check wiring paths | Plan routes to avoid sharp edges or moving parts |
| Secure loose parts | Use tape or clips to hold wires safely |
| Test fit components | Make sure new equipment fits without obstruction |
Installing The Car Radio
Installing a car radio lets you enjoy music and news on the road. A good setup needs proper wiring, secure mounting, and testing.
This guide covers three key parts to get your car radio working well and safe.
Wiring Connections
Wiring the radio correctly is very important. Each wire connects to a specific part of your car’s electrical system.
- Match the color-coded wires from the radio to the car wires.
- Use wire connectors or crimp terminals for strong connections.
- Attach the power wire to the battery or ignition switch.
- Connect the ground wire to a metal part of the car frame.
- Hook up the speaker wires to the car speakers.
- Ensure the antenna wire is plugged in for radio signal.
Mounting The Radio
Mount the radio firmly to avoid damage and noise. Use the right tools and brackets for your car model.
| Mounting Step | Details |
| Remove old radio | Use trim tools to avoid damage |
| Fit mounting bracket | Secure with screws or clips |
| Attach radio | Slide or bolt into bracket |
| Check alignment | Make sure radio face is flush |
Testing The System
Testing the radio system ensures it works correctly and safely. Check all functions before finalizing installation.
- Turn the car ignition on to power the radio.
- Check the radio turns on and the display lights up.
- Test sound by playing music or a radio station.
- Adjust the volume and balance settings.
- Verify the antenna receives a clear signal.
- Listen for any noise or interference.
Installing The Backup Camera
A backup camera can make parking easier and safer. It provides a clear view of what’s behind your car.
Let’s learn how to install a backup camera step by step. This involves mounting, wiring, and connecting the system.
Mounting The Camera
The first step is finding the right spot for your camera. Most people choose the license plate area.
Make sure the camera is secure and aligned properly. This ensures you get a good view when reversing.
Running The Wires
Running the wires from the camera to the display unit is crucial. You want to hide them for a clean look.
- Run wires through the trunk into the cabin.
- Use existing grommets to keep wires hidden.
- Secure wires with zip ties to prevent dangling.
Connecting To Power And Display
The camera needs power to function. Connect it to the reverse light wire so it activates when you reverse.
| Component | Connection |
| Camera | Reverse Light Wire |
| Display Unit | Dashboard or Rearview Mirror |
| Power Source | Vehicle Battery |
Once connected, test the camera by shifting into reverse. The display should show the camera’s view.
Troubleshooting Common Issues
Installing a car radio and backup camera can be tricky. Sometimes, issues arise even after installation. Here are some common problems and how to solve them.
Understanding these issues helps keep your system running smoothly. Let’s explore solutions for common problems.
No Power Or Signal
If your car radio or backup camera has no power, check connections first. A loose wire may cause this issue.
Ensure all cables are secure and properly connected. Inspect the fuse to see if it needs replacing.
- Check power cable connection
- Inspect fuse for damage
- Ensure the ground wire is secure
Poor Image Quality
Poor image quality can be frustrating. First, check the camera lens for dirt or smudges. Clean it gently with a soft cloth.
Adjust the camera angle to ensure it captures the road correctly. Check the display settings on your monitor.
- Clean the camera lens
- Adjust the camera angle
- Check display settings
Audio Problems
If the audio is not clear, check speaker connections. Loose wires may cause sound issues. Inspect the radio settings for balance and fade.
Make sure volume levels are set correctly. Replace damaged speakers if needed.
- Check speaker connections
- Adjust balance and fade settings
- Verify volume levels

Credit: www.youtube.com
Tips For Professional Results
Installing a car radio and backup camera takes care and skill. You want the job to look neat and work well. Good practices help you get clean, lasting results.
Focus on careful wiring, solid mounting, and ongoing checks. These tips will guide you to a professional finish that lasts.
Cable Management
Keep wires tidy to avoid damage and signal problems. Use cable ties and clips to hold wires close to the car frame. Avoid sharp bends and heat sources.
- Group cables by function and length
- Use split loom tubing for protection
- Label wires for easy identification
- Secure cables away from moving parts
Securing Components
Mount the radio and camera firmly to prevent noise and damage. Use the right screws and brackets. Check that mounts do not block vents or controls.
| Component | Recommended Fastener | Mounting Tip |
| Car Radio | Self-tapping screws | Use factory slots if available |
| Backup Camera | Small bolts with washers | Place where view is clear and protected |
| Wiring Harness | Cable ties | Keep tension low and avoid rubbing |
Regular Maintenance
Check your installation often to keep it working well. Clean contacts and look for loose parts. Fix any wear or damage early.
- Inspect wiring for cracks or wear
- Clean connectors with electronic cleaner
- Test camera and radio functions monthly
- Tighten any loose screws or clips
Credit: hi-techcaraudio.com
Frequently Asked Questions
How Long Does Car Radio And Backup Camera Installation Take?
Installation typically takes 1 to 3 hours, depending on the vehicle. Complex wiring or custom setups may require more time. Professional installers ensure proper connections for optimal performance and safety.
Can I Install A Backup Camera Myself?
Yes, with basic tools and knowledge, self-installation is possible. However, professional installation guarantees correct wiring and camera alignment. DIY kits often include detailed instructions to guide you through the process.
Will A New Car Radio Improve Sound Quality?
Upgrading your car radio can significantly enhance sound clarity and features. Modern radios support Bluetooth, USB, and smartphone integration, improving your overall audio experience on the road.
Is It Necessary To Upgrade Wiring During Installation?
Sometimes, upgrading wiring is needed for compatibility and safety. Older vehicles may require new cables to support advanced radios and backup cameras. Proper wiring ensures reliable performance and prevents electrical issues.
Conclusion
Installing a car radio and backup camera improves driving safety and comfort. These devices offer clear sound and better rear visibility. You can enjoy hands-free calls and easy navigation. Installation is simple with the right tools and instructions. Choose quality products for long-lasting use.
Regular maintenance keeps your system working well. Upgrade your car to drive with more confidence today.


